

Key Takeaways:
- Transform your home with 5 budget-friendly DIY projects ranging from $50-$300 per project - perfect for spring refreshing without breaking the bank
- Create functional storage solutions with a DIY mudroom bench and pegboard organization system, ideal for decluttering and maximizing space
- Refresh your home's aesthetics with simple projects like statement walls and window valances that can be completed in just one weekend
- All projects require basic DIY skills and common household tools, making them accessible for beginners
- Save money by refinishing outdoor furniture instead of buying new pieces, with potential savings of up to 75%
- Take advantage of 0% APR financing through SimpleDirect to spread out the cost of materials and supplies over time
Introduction
Spring is the perfect season to breathe new life into your home with simple DIY upgrades.
Following our popular first installment of spring home improvements, we're back with five more budget-friendly projects that anyone can tackle over a weekend.
These carefully selected projects require minimal tools and basic skills, yet deliver impressive results that can transform your living space.
Whether you're looking to enhance organization, add style, or create functional storage solutions, these DIY projects offer the perfect blend of practicality and creativity.
From crafting a stylish mudroom bench to refreshing outdoor furniture, each project is designed to help you maximize your home's potential without the need for professional help.
Let's dive into these accessible home improvements that will give your space a fresh spring makeover.
-1745827170368.jpg)
Project #1: DIY Mudroom Bench - Your Entryway Game-Changer
Materials Needed:
- 1x pre-made bench or wooden storage cube ($50-75)
- Wall hooks and mounting hardware ($15-20)
- Paint or stain of your choice ($20-25)
- Cushion fabric and foam padding (optional, $30-40)
Total Cost Range: $85-160
Step-by-Step Instructions:
- Choose your location and measure the space
- Mount hooks at eye level (approximately 5 feet high)
- Position bench below hooks, ensuring proper spacing
- Secure bench to wall using L-brackets for stability
- Add cushioning and fabric if desired
- Paint or stain to match your decor
Pro Tips:
• Select hooks that can handle heavy coats and bags
• Choose moisture-resistant materials for longevity
• Add baskets under the bench for extra storage
• Consider adding a small shelf above hooks for additional storage
Project Time: 2-3 hours
Skill Level: Beginner-Friendly
Project #2: Transform Your Space with a Statement Wall
A statement wall is an affordable way to add personality and visual interest to any room.
Whether you prefer bold colors, geometric patterns, or subtle textures, this weekend project can dramatically change your space's atmosphere without a significant investment.
Materials Needed:
- Paint (1-2 gallons): $30-45
- Painter's tape: $8-12
- Paint rollers and brushes: $20-25
- Drop cloths: $10
- Measuring tape and level: $15
Total Cost Range: $75-105
Popular Design Ideas:
- Geometric patterns
- Color blocking
- Vertical or horizontal stripes
- Herringbone design
- Simple mountain scene
Implementation Steps:
- Clean and prep wall surface
- Measure and mark your design
- Apply painter's tape for patterns
- Paint base color and let dry
- Add pattern or secondary colors
- Remove tape while paint is still slightly wet
Common Mistakes to Avoid:
- Skipping wall preparation
- Not using primer when needed
- Removing tape after paint dries completely
- Rushing between coats
- Forgetting to check paint lines with level
Project Time: 4-6 hours (including drying time)
Skill Level: Beginner to Intermediate
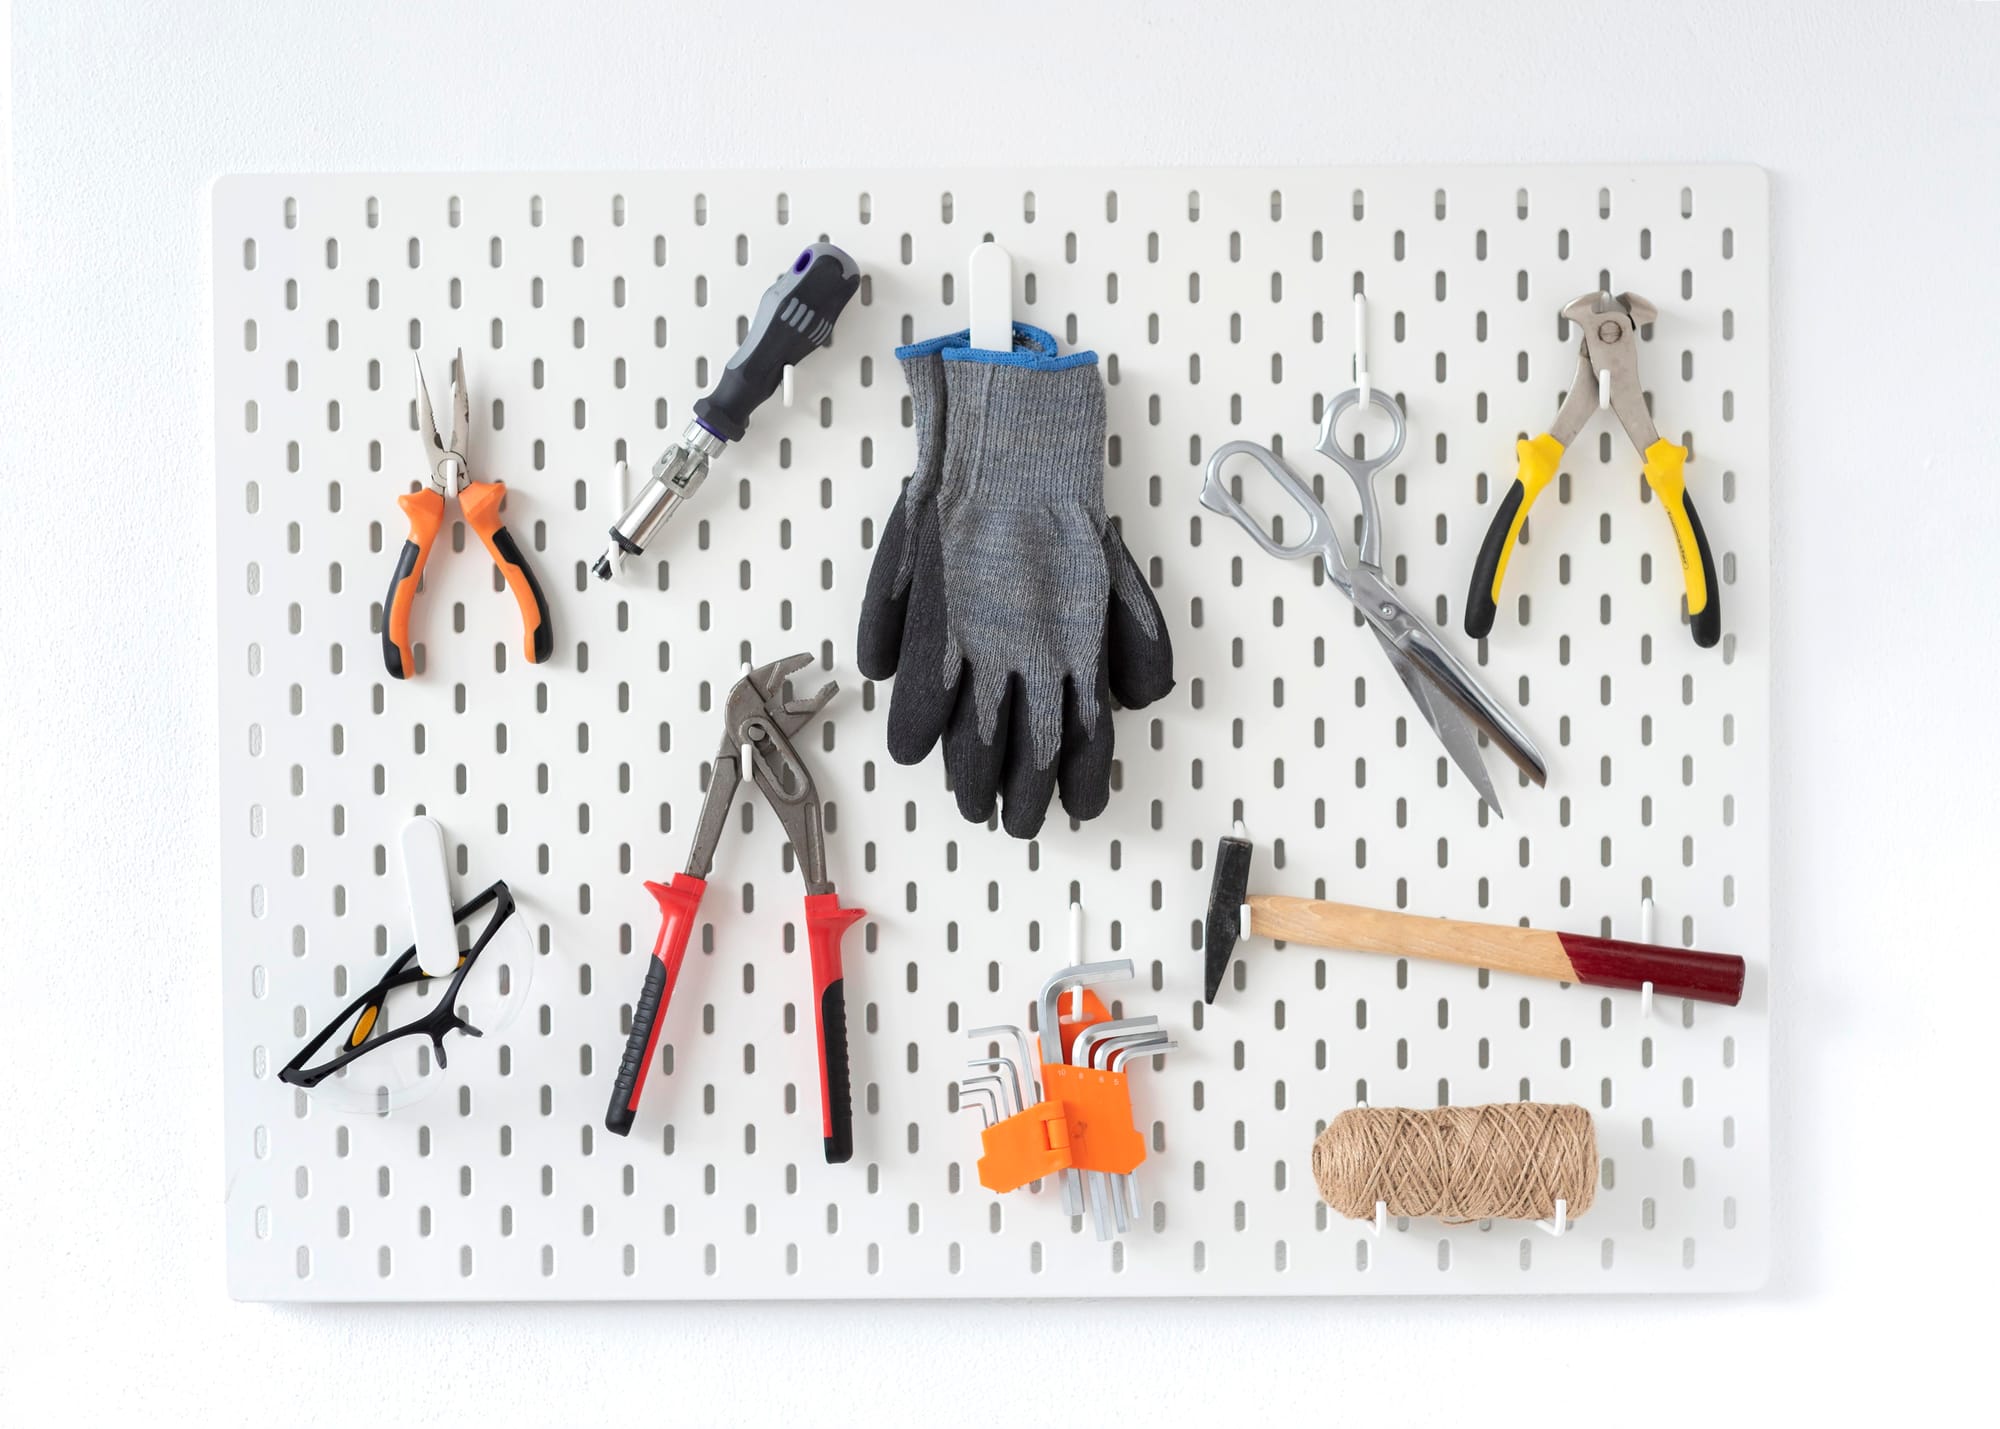
Project #3: Create a Custom Pegboard Storage Solution
Transform any cluttered space into an organized oasis with a versatile pegboard system.
Perfect for garages, craft rooms, or kitchens, pegboards offer endless customization options and make it easy to keep everything visible and accessible.
This affordable organization solution can be adapted to fit any space or storage need.
Materials and Tools Required:
- Pegboard (4x4 ft): $20-25
- 1x2 furring strips: $10-15
- Pegboard hooks and accessories: $25-30
- Drill and screws: $15-20
- Level and measuring tape: $10
Total Cost Range: $80-100
Installation Process:
- Locate wall studs
- Attach furring strips to studs
- Mount pegboard to furring strips
- Add hooks and accessories
Organization Tips:
- Group similar items together
- Create zones for different activities
- Use tool silhouettes for easy replacement
- Label areas for family members
- Rotate seasonal items
Creative Uses:
- Kitchen utensil display
- Craft supply organization
- Home office storage
- Garden tool arrangement
- Kids' art supply station
Project Time: 2-3 hours
Skill Level: Beginner
Project #4: Breathe New Life into Your Outdoor Furniture
Don't replace that weathered patio set just yet! With some basic supplies and a weekend's effort, you can transform tired outdoor furniture into stunning pieces that look store-bought new.
This cost-effective refresh project can save you hundreds compared to buying new furniture while adding personal style to your outdoor space.
Materials Needed:
- Outdoor paint or stain: $25-35
- Sandpaper (various grits): $10-15
- Primer (if needed): $15-20
- Paint brushes/rollers: $15-20
- Protective clear coat: $15-20
Total Cost Range: $80-110
Preparation Steps:
- Clean thoroughly with soap and water
- Sand rough surfaces and remove rust
- Wipe down with mineral spirits
- Apply primer if needed
- Let dry completely
Paint Selection Tips:
- Choose weather-resistant formulas
- Oil-based for metal furniture
- Latex-based for wood pieces
- Consider spray paint for intricate pieces
- Select UV-resistant options
Application Techniques:
- Apply thin, even coats
- Use foam rollers for smooth surfaces
- Work in optimal weather conditions
- Allow proper drying time between coats
- Apply 2-3 coats for durability
Maintenance Tips:
- Store furniture during harsh weather
- Clean regularly with mild soap
- Touch up chips promptly
- Reapply clear coat annually
- Use furniture covers when not in use
Project Time: 2-3 days (including drying time)
Skill Level: Beginner
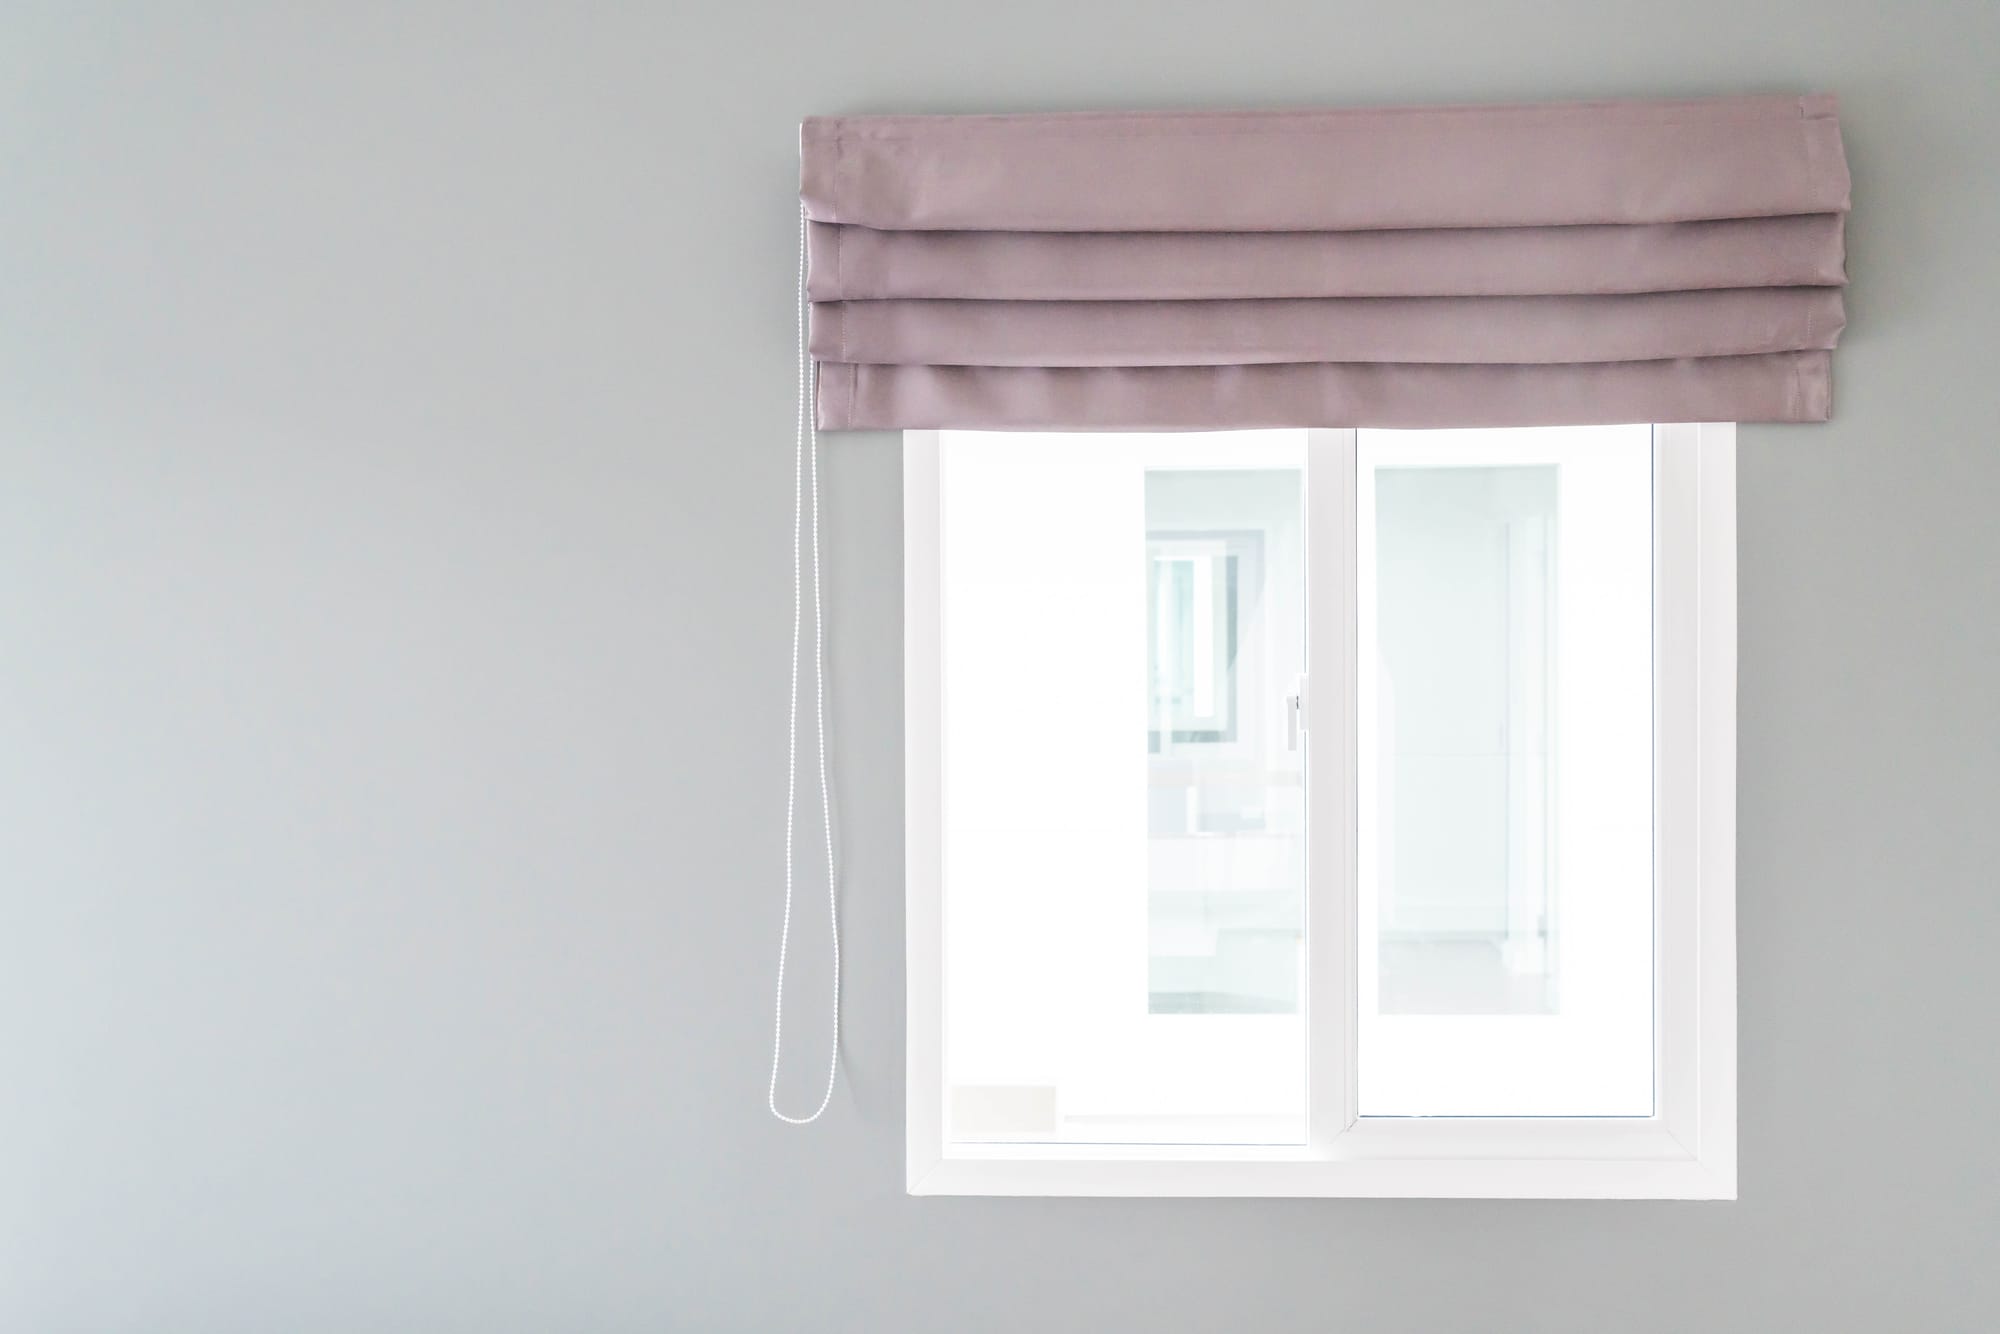
Project #5: Create Elegant No-Sew Window Valances
Give your windows a designer look without the hefty price tag or sewing skills. This no-sew window valance project offers a quick way to add style and personality to any room.
Perfect for renters or those new to DIY, these custom valances can be easily changed with the seasons or your evolving decor preferences.
Materials Needed:
- 1x4 wooden board (cut to window width): $8-10
- Fabric of choice (width of window + 12"): $15-30
- Iron-on hem tape: $5-8
- Staple gun and staples: $20
- Mounting brackets: $10-15
Total Cost Range: $58-83
Assembly Instructions:
- Measure and cut board to window width
- Iron fabric to remove wrinkles
- Wrap fabric around board, creating pleats
- Secure fabric with staples underneath
- Use hem tape for clean edges
- Mount brackets and hang valance
Style Suggestions:
- Bold patterns for statement pieces
- Neutral solids for classic looks
- Seasonal fabrics for holiday themes
- Layer with existing curtains
- Add trim or tassels for extra flair
Project Time: 1-2 hours
Skill Level: Beginner
Pro Tip: Choose medium-weight fabrics that hold shape well and avoid very lightweight materials that may sag.
Smart Financing for Your Spring Projects
Ready to tackle these DIY projects but want to manage your budget wisely? SimpleDirect offers flexible financing solutions that make your home improvements more affordable and stress-free.
0% APR Financing Options:
- Access funds immediately for project materials
- Spread costs over 6-18 months
- No interest charges during promotional period
- Simple online application process
Benefits of SimpleDirect Financing:
- Quick approval decisions
- Competitive rates
- No hidden fees
- Multiple lender options
- User-friendly mobile app access
How to Apply:
- Visit SimpleDirect's website
- Complete the simple online application
- Receive instant decision
- Start shopping for your project materials
- Manage payments through our convenient platform
Pro Tip: By using 0% APR financing, you can tackle multiple projects at once while maintaining your cash flow. Consider bundling projects to maximize your home improvement impact!
Conclusion
Transform your home this spring with these five budget-friendly DIY projects that combine style, functionality, and value.
Whether you tackle one project or all five, SimpleDirect's financing solutions make it easy to bring your vision to life.
Ready for more inspiration? Check out Part 1 of our Spring Home Upgrades series for additional project ideas, and start planning your home transformation today.
Remember, with the right tools, materials, and financial support, any home improvement goal is within reach.