DIY Made Simple: A Comprehensive Guide to Basic Home Repairs
Basic DIY Home Repairs can save homeowners money and enhance property value, making them essential skills for every homeowner.
Key Takeaways
- DIY home repairs can save you money and increase the value of your home.
- Essential tools for DIY home repairs include hammers, screwdrivers, and pliers.
- Common DIY repair projects include fixing leaky faucets, simple electrical fixes, and painting.
- A step-by-step guide can help you fix a leaky faucet with ease.
- Beginners can tackle easy electrical fixes like changing a light bulb or replacing a socket.
- DIY painting can be straightforward with the right preparation, paint choice, and technique.
- Troubleshoot common plumbing issues such as blocked drains and running toilets yourself to save on repair costs.
- Always prioritize safety when undertaking DIY home repairs.
- Quick fixes for common household problems like squeaky doors and loose handles can be handled without professional help.
- Beginners can benefit from starting with small projects and gradually taking on bigger ones.
- Simple DIY repairs like patching up a hole in the wall or fixing a broken tile can be easily done.
- DIY home renovation ideas like updating a kitchen backsplash or building a patio can add significant value to your home.
- DIY home repairs are empowering, cost-saving, and a great way to improve your living space.
Introduction to Basic DIY Home Repairs
In today's era of rising costs, learning basic DIY home repairs can be a lifesaver and a great way to empower yourself. Not only does it save you money that would otherwise be spent on professional repair services, but it also gives you the satisfaction of fixing things around your house yourself.
Moreover, acquiring these skills can increase the value of your home. Potential buyers often appreciate well-maintained houses where common issues have been addressed. This can give you an edge in the real estate market, potentially speeding up a sale or even boosting your selling price.
Additionally, understanding your home's systems and how to maintain them can help prevent small problems from becoming big ones. A leaky faucet or a blocked drain, if left unattended, can lead to more significant issues that cost substantial amounts of money to repair.
So, whether you're a homeowner looking to save on repair costs, or a business owner aiming to make your property more appealing to buyers or renters, learning basic DIY home repairs can be a valuable investment of your time. Dive into our guide and get ready to become a DIY repair pro!
Economic Benefits
According to a report by HomeAdvisor, homeowners spend an average of $1,105 annually on home maintenance, which includes routine inspections and repairs. By mastering basic DIY skills, you can drastically reduce these costs. For instance, simple tasks like fixing a leaky faucet or patching a drywall hole can be learned easily through online tutorials and require minimal investment in tools. The potential savings from handling these repairs yourself, as opposed to hiring professionals, can add up significantly over time.
Enhancing Property Value
Studies suggest that homes with well-maintained aesthetics and functional systems appeal more to potential buyers, often selling at a premium. For example, DIY Network mentions that DIY projects like repainting your home or upgrading fixtures can yield a return on investment of up to 75%. This not only helps in maintaining the structural integrity of your home but also boosts its market value, providing a lucrative return when you decide to sell.
Preventative Benefits
Understanding your home’s systems and how to maintain them can help prevent small issues from becoming major expenses. A report by the American Society of Home Inspectors indicates that regular DIY maintenance can prevent 85% of the common household repairs, ultimately saving homeowners significant amounts of money in long-term repairs. For example, regularly clearing out gutters and downspouts can prevent water damage, and cleaning or replacing HVAC filters can extend the life of your heating and cooling system.
Essential Tools for DIY Home Repairs
Every DIY enthusiast knows that having the right tools is crucial for tackling home repairs efficiently and effectively. Here’s an expanded guide on the essential tools needed for basic DIY home repairs, explaining why each tool is necessary and how it can be used in various repair projects:
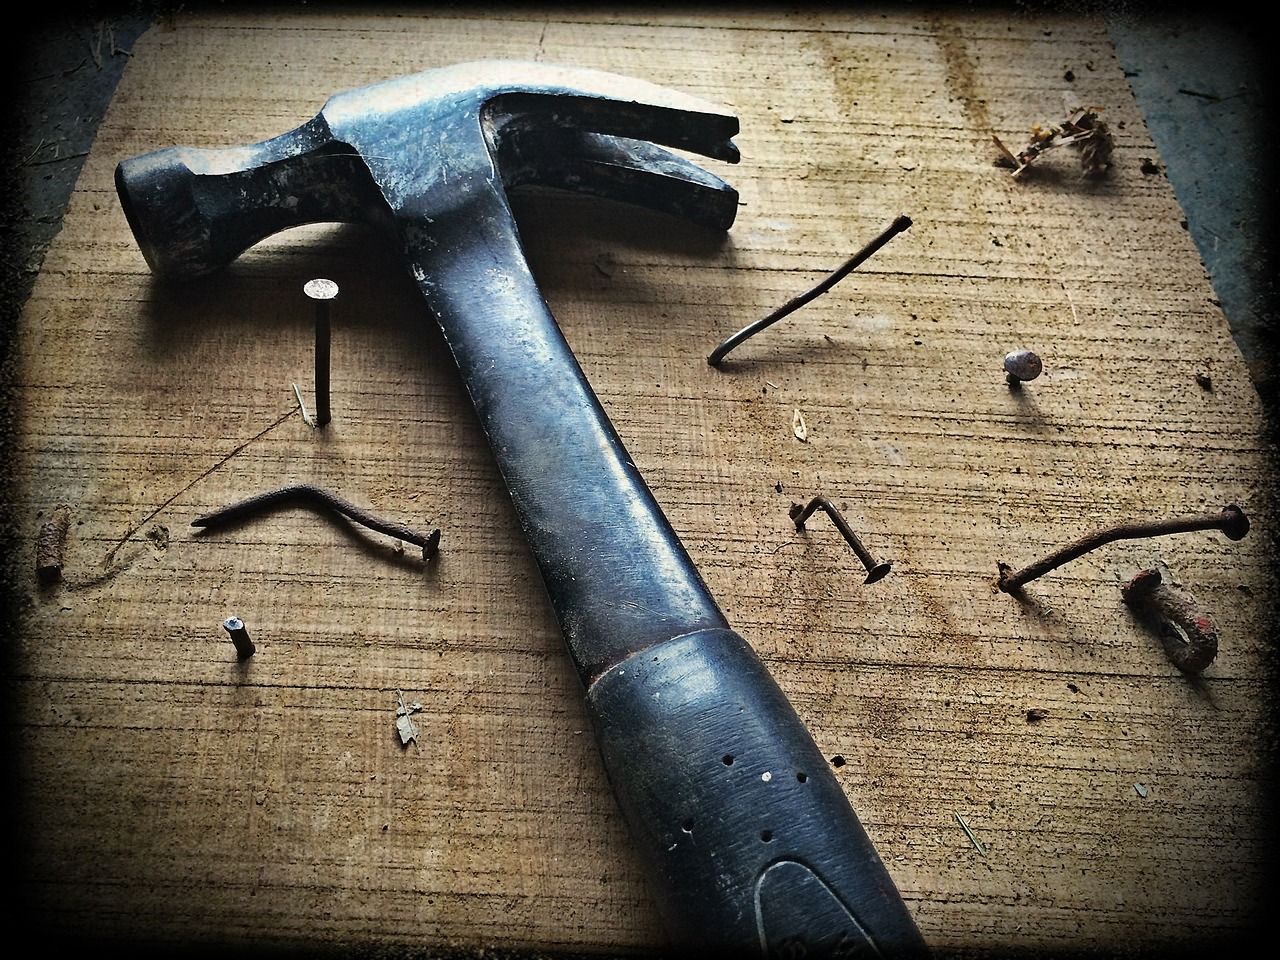
- Hammer: A basic claw hammer is indispensable for driving nails into wood for projects like hanging pictures or assembling furniture, as well as for removing nails. Its dual functionality makes it a must-have in any DIY toolkit. A sturdy and well-balanced claw hammer is a must-have. It's used for driving in and pulling out nails.
- Utility Knife: From trimming carpet edges to opening boxes or cutting through wallpaper, a sharp utility knife is versatile. It's more precise than scissors and can be safely retracted when not in use.
- Screwdrivers: A set of screwdrivers (both flat-head and Phillips) is essential. These tools are used for assembling furniture, tightening cabinet hardware, or opening up household appliances for repairs. Consider investing in a screwdriver set with various sizes to ensure you have the right fit for different screws, which can prevent damage to both the screw and the surface.
- Level: Ensuring your projects are perfectly horizontal or vertical is essential, especially when hanging wall art or installing shelving. A level helps prevent uneven installations that could lead to functional problems or visual discord.
- Pliers: Pliers are useful for gripping, twisting, and cutting wires, which is essential for electrical projects like replacing a light fixture or updating a wall socket. Needle-nose pliers, in particular, are good for reaching into tight places where fingers may not easily fit.
- Wrench Set: An adjustable wrench is crucial for plumbing repairs such as tightening or loosening pipes. Having a set of combination wrenches can also be handy for tasks that require holding a nut in place while turning a bolt.
- Drill: A power drill, preferably cordless for convenience, is invaluable for making holes or driving screws faster than a manual screwdriver can. It's perfect for tasks like securing drywall or building decks.
- Tape Measure: Whether you’re building a shelf or simply ensuring furniture fits in a space, a reliable tape measure is a fundamental tool. It's used frequently in almost every project to ensure accuracy in sizing.
- Safety Gear: Safety should never be overlooked. Safety glasses protect your eyes from flying debris, work gloves protect your hands from sharp objects, and ear protection is essential when using loud power tools.
By understanding the uses and importance of each tool, beginners can confidently handle a variety of home repair tasks more safely and efficiently. Each tool serves a fundamental purpose in a well-rounded DIY toolkit, ensuring you’re prepared for the most common home maintenance tasks.
Let's illustrate the importance of these tools with a real-life example. Imagine you're trying to assemble a piece of furniture, but the screws are too tight for your hands to manage. Without a screwdriver, you might resort to using a butter knife or a coin, risking damage to both the screw and your improvised tool. But with a screwdriver, you can easily loosen the screws and assemble the furniture without any hassle. This example demonstrates how having the right tools can save the day, make your work easier, and ensure the longevity of the items you're working on.
Common Basic Home Repair Projects
Several common home repair tasks can be easily managed by homeowners themselves. Here are a few examples:
- Fixing a Leaky Faucet: A constant drip can be more than just annoying; it can also waste a lot of water over time. The average cost of professional repair can range from $100 to $250, but fixing it yourself can cost as little as $20 for a replacement part.
- Simple Electrical Fixes: Replacing a light bulb or a socket are tasks most homeowners can handle. A professional might charge around $50 to $100 for such simple fixes, but doing it yourself will only cost you the price of the bulb or socket, which is typically less than $10.
- Painting: Whether you're freshening up a room or painting an entire house, doing it yourself can save a lot. Professional painters can charge $200 to $400 per room, not including paint. However, with a bit of time and effort, you can get the task done for the cost of paint and supplies, which could be around $50 to $100 per room.
- Unclogging Drains: Calling a professional for a clogged drain can cost you anywhere between $100 to $200. However, with a bit of knowledge and a $10 plunger or hand auger, you can do it yourself.
- Fixing a Running Toilet: The incessant sound of a running toilet can be fixed with a simple adjustment or part replacement. A plumber might charge $50 to $150 for this job, but a DIY fix could run you about $20 for a new fill valve or flapper.
In conclusion, tackling these common home repair projects yourself can save you a significant amount of money in the long run. Plus, there's the added satisfaction of solving the problem with your own hands.
Step-by-Step Guide to Fixing a Leaky Faucet
Fixing a leaky faucet is a common household repair that you can handle yourself with the right tools and a little know-how. Here's a step-by-step guide to help you get the job done:
Tools Needed:
- Adjustable wrench or C-wrench
- Screwdriver
- Replacement parts (if necessary)
- Plumber's tape
Steps:
- Shut Off the Water: Before starting, make sure to shut off the water supply to avoid any mishaps. You'll usually find the shut-off valves under the sink.
- Identify the Type of Faucet: Different faucets like ball, cartridge, or ceramic disk have different internal mechanisms, so it's crucial to identify yours.
- Disassemble the Faucet: Using your wrench and screwdriver, carefully disassemble your faucet. It's a good idea to plug the drain to prevent any small parts from going down it.
- Inspect the Parts: Once disassembled, inspect the parts to identify the cause of the leak. Usually, it's due to worn-out components like O-rings, washers, or seals.
- Replace the Faulty Parts: Depending on the condition of the components, you may need to replace the faulty parts. You can find replacements at a local hardware store.
- Reassemble the Faucet: After replacing the components, reassemble the faucet carefully. Use plumber's tape on the threads to ensure a good seal.
- Test: Turn the water supply back on and test the faucet. If the leak persists, you may need to disassemble it again and check for any missed issues.
Safety Precautions:
Always make sure to turn off the water supply before starting repairs to avoid flooding. Be careful when handling tools and small parts, and make sure to keep them out of reach of children. When disassembling and reassembling the faucet, do so gently to avoid damaging any parts. Remember, safety first!
Easy Electrical Fixes for Beginners
Electrical work might sound intimidating, but there are several simple fixes almost anyone can perform with basic tools and a little caution. Here are a few examples:
- Changing a Light Bulb: This is perhaps the most basic of all electrical tasks. Simply unscrew the old bulb, and screw in the new one. Always ensure the power is off before you begin, and never exceed the wattage specified on the fixture.
- Replacing a Socket: Over time, sockets can become worn and need replacement. First, turn off the power at the circuit breaker. Then, remove the faceplate and unscrew the socket from the box. Disconnect the wires, attach them to the new socket, and then screw it back into the box. Always ensure you connect the wires correctly - the black (hot) wire to the brass screw, the white (neutral) wire to the silver screw, and the green (ground) wire to the green screw.
- Installing a Dimmer Switch: This is a slightly more complicated task but can be done with patience. After turning off power at the circuit breaker, remove the faceplate and the existing light switch. Connect the wires from the dimmer switch to the same colored wires in the wall box and secure with wire nuts. Then, screw the dimmer switch back into the box and replace the faceplate.
A real-life example of a DIY fix that went well involves replacing a socket. When the living room socket started causing flickering, rather than paying a professional, the homeowner turned off the power, carefully removed the old socket, and connected a new one. With patience and careful work, the new socket was installed, saving the homeowner a hefty bill and providing a sense of accomplishment. However, always remember, safety comes first. If you're unsure or uncomfortable with a task, don't hesitate to call a professional.
Painting Tips and Tricks for DIY Enthusiasts
A fresh coat of paint can do wonders to spruce up your home. With some preparation and the right techniques, you can achieve a professional-looking finish. Here's a guide to help you:
Preparation:
- Clean the Walls: Dust and grime can affect paint adhesion. Wipe the walls with a damp cloth and let them dry completely.
- Protect Surfaces: Cover floors, furniture, and fixtures with drop cloths to protect them from paint splatters.
Choosing the Right Paint:
- Paint Type: Latex-based paints are great for general use, while oil-based paints are good for high-traffic areas due to their durability.
- Finish: Flat finishes hide imperfections well, while glossier finishes are more durable and easier to clean.
Application Techniques:
- Cutting-In: Use a small brush to paint around the edges of the room first. This technique, called 'cutting in,' prevents roller marks near the trim.
- Use a Roller: For larger areas, use a roller. Start in the middle of the wall and roll upwards, then downwards in a 'W' pattern for even coverage. Avoid overloading your roller with paint to prevent drips.
Professional-looking Finish:
- Sand Between Coats: For a super smooth finish, lightly sand the paint between coats using a fine-grit sandpaper.
- Use a Paint Extender: Adding a paint extender to your paint can help eliminate brush and roller marks by slowing the drying time.
Remember, patience and attention to detail are key to achieving a professional finish. Happy painting!
Troubleshooting Common Plumbing Issues
Plumbing issues can be a nuisance, but with a little patience and know-how, you can troubleshoot common problems. Here are a few:
Blocked Drains: Blocked drains are a common issue in most homes. The solution is often as simple as using a plunger. If the blockage is stubborn, a plumber's snake or a hand auger can be used to dislodge the clog.
Running Toilets: A constantly running toilet can waste a lot of water. The issue is usually with the flapper not sealing correctly. Replacing the flapper often solves the problem.
Now, let's dive into a step-by-step guide on how to unclog a drain:
- Use a Plunger: Cover the overflow hole with a rag or towel, place the plunger over the drain, and plunge vigorously. This can often dislodge minor clogs.
- Use a Plumber's Snake or Hand Auger: If the clog is stubborn, you might need to use a plumber's snake or a hand auger. Insert the tool into the drain and turn it to break up the clog.
- Use a Drain Cleaner: If manual methods fail, a chemical drain cleaner can be used. Be sure to use this as a last resort and follow all safety instructions.
Remember, if these methods fail or if you feel uncomfortable doing it yourself, it's best to call a professional plumber.
Safety Precautions for DIY Home Repairs
When doing DIY home repairs, safety should always be your top priority. Here are some vital precautions to consider:
- Use proper protective gear: Depending on the task, this could include safety goggles, gloves, ear protection, or a dust mask.
- Understand your tools: Before you start, make sure you know how to use your tools correctly. Misuse can result in injury or damage to your home.
- Ensure electrical safety: Always turn off the power at the circuit breaker before starting any electrical work.
- Use a sturdy ladder: When working at height, always use a stable and suitable ladder. Never overreach or use a chair instead of a ladder.
- Keep a clean workspace: Keep your work area clean and free from hazards. Remove any loose wires, nails, or other debris that can cause accidents.
- Know your limits: If a job is beyond your skill level, don't hesitate to call in a professional. It's better to be safe than sorry.
For instance, a homeowner once decided to replace a ceiling fan by himself. He remembered to turn off the power at the circuit breaker, preventing a potential electrical shock. However, he almost used a swivel chair to reach the ceiling. Realizing the risk, he decided to use a sturdy ladder instead, which helped him maintain balance and successfully replace the fan without any accidents. This situation shows the importance of understanding and following safety precautions during DIY home repairs.
Quick Fixes for Common Household Problems
Dealing with minor household issues can be hassle-free with the right quick fixes. Here's how to address some of the most common problems:
- Squeaky Doors: This pesky problem can often be solved with a simple solution: lubrication. Apply a lubricant like WD-40 to the door hinges, ensuring the door is open for ease of application and full coverage.
- Loose Handles: If a door handle or cabinet knob is loose, it's usually due to a screw that has come loose over time. Tighten the screw with the appropriate screwdriver - usually, a Phillips or flathead will do the trick.
- Sticky Drawers: For wooden drawers that don't slide smoothly, rub an old candle or bar of soap along the tracks to create a more slippery surface.
- Minor wall dents: Small dents in the wall can be easily repaired with a bit of spackle and paint. Apply the spackle to the dent, smooth with a putty knife, let dry, then sand and paint.
Remember, the trick to quick fixes is to address the problem as soon as you notice it. This not only prevents the issue from escalating but also helps maintain the overall condition of your home.
Home Repair Tips for Beginners
Embarking on a DIY home repair journey can be exciting but also daunting for beginners. Here are some tips to guide you:
- Start Small: Begin with simple tasks, like fixing a leaky faucet or patching a hole in the wall. These small victories will build your confidence.
- Educate Yourself: Use online tutorials, guides, and books to learn about the task at hand. Knowledge is power when it comes to DIY.
- Gather the Right Tools: Having the right tools is crucial for any DIY project. Always ensure you have what you need before you start.
- Safety First: Always prioritize your safety. Use protective gear, and don't take on tasks that seem beyond your skill level, particularly with electricity or major plumbing work.
- Gradually Take On Bigger Projects: As your skills improve, start taking on larger projects. It might be installing a new light fixture or even building a piece of furniture.
Remember, practice makes perfect. Don't be disheartened if you make mistakes along the way. That's part of the DIY journey.
Expert Opinions
Here's some expert advice from experienced DIY professionals that you might find useful:
- Practical Tips for Simple Repairs: Charles Byers, an experienced DIY author, suggests tackling repairs that are simple and inexpensive as a good start. He recommends routine maintenance like replacing furnace air filters, cleaning gutters, and clearing vents to prevent bigger issues (Source: InsideHook).
- When to Call Professionals: Byers also advises against DIY attempts on projects that involve significant risk or specialized knowledge, such as electrical work in the service panel or major plumbing repairs. For renters, he suggests consulting with landlords before undertaking any major alterations to avoid potential disputes (Source: InsideHook).
- Everyday Tools and Their Uses: In addition to standard tools like screwdrivers and hammers, Byers recommends having a polarity plug tester, especially for older homes. This tool can help diagnose electrical outlet issues quickly, preventing potential hazards (Source: InsideHook).
- Approach to Home Repairs: From another perspective, Elisabeth Beauchamp emphasizes the benefits of video tutorials for DIY home repairs. She notes that many common home repairs, such as fixing a clogged dishwasher or replacing a toilet, can be learned and accomplished through detailed video instructions available online (Source: Today's Homeowner).
Simple DIY Repairs
Tackling simple DIY repairs at home not only saves you money but also adds to your skill set. Here are a couple of repairs that you can easily do yourself:
- Patching a Hole in the Wall: Small holes in the wall, often caused by nails or screws, can be quickly fixed. Use a putty knife to fill the hole with spackle, let it dry, then sand it smooth. Finish by painting over the patch to match your wall.
- Fixing a Broken Tile: Tiles can crack or break over time. To replace one, you'll need a chisel and hammer to remove the old tile and adhesive. Apply tile adhesive to the back of the new tile, place it in the empty spot, and let it dry. After, apply grout around the tile and wipe away the excess with a damp sponge.
Remember, while these tasks are simple, they still require caution. Always prioritize safety by wearing appropriate protective gear and working in a well-ventilated area.
DIY Home Renovation Ideas
Enhancing your living space through DIY renovations can significantly increase the value of your home. Here are some ideas:
- Update Kitchen Backsplash: A new backsplash can dramatically change the look of your kitchen. Opt for peel-and-stick tiles for an easy, cost-effective update.
- Build a Patio: A well-designed outdoor space adds significant value and appeal. With a bit of planning and effort, you can build your own patio or deck.
- Paint Walls: A fresh coat of paint can transform a room. Neutral tones appeal to a wider range of potential buyers, but don't be afraid to express your personal style.
- Install Crown Molding: This classic upgrade adds elegance and value to any room. Crown molding kits are available, making this a doable DIY project.
- Refresh Landscaping: Good curb appeal can greatly increase your home's value. Consider planting new flowers, adding mulch, or installing a stone path.
- Update Light Fixtures: Modern light fixtures can significantly brighten up your space and provide a more updated look.
- Upgrade Hardware: Replace outdated cabinet handles, drawer pulls, and door knobs. It's a small change that can make a big difference.
Remember, even the simplest changes can have a big impact on your home's value and appeal. So roll up your sleeves and start renovating!
FAQ Section: Basic DIY Home Repairs
Q1: What are the financial benefits of learning DIY home repairs? A1: Learning DIY home repairs can significantly reduce the costs associated with hiring professionals for minor fixes and maintenance. According to HomeAdvisor, homeowners can save an average of over $1,000 per year by handling routine repairs themselves.
Q2: What are the essential tools needed for basic DIY home repairs? A2: Key tools include a hammer, screwdrivers, pliers, a wrench set, a tape measure, a utility knife, a level, and a cordless drill. Each tool serves specific functions such as measuring, cutting, tightening, or assembling, making them indispensable for various home repair tasks.
Q3: Can DIY home repairs actually increase the value of my home? A3: Yes, effectively executed DIY projects can enhance your home's appeal and functionality, potentially increasing its market value. Well-maintained and aesthetically pleasing homes tend to attract higher offers from potential buyers.
Q4: What are some common DIY home repair projects? A4: Common projects include fixing leaky faucets, basic electrical fixes like changing light bulbs or sockets, painting, unclogging drains, and fixing running toilets. These projects generally require minimal tools and can offer substantial savings over hiring professionals.
Q5: Are there any DIY repairs I should avoid doing myself? A5: Yes, projects that involve complex electrical wiring, major plumbing, or structural changes should be handled by professionals due to the high risk of injury or significant property damage.
Q6: How do I ensure safety while performing DIY repairs? A6: Always wear appropriate safety gear such as gloves, goggles, and ear protection. Ensure that you turn off power when working with electrical components and understand how to use each tool properly. Additionally, avoid working on projects that exceed your skill level.
Q7: What should I do if I encounter a problem during a DIY repair? A7: If you encounter a problem, consult online tutorials, DIY books, or forums for guidance. If the issue persists or is beyond your capability, it's advisable to contact a professional to prevent further damage or safety hazards.
Q8: Are there resources available to help beginners learn DIY home repairs? A8: Numerous resources are available, including online videos, step-by-step guides, DIY workshops offered by local hardware stores, and books on home repair. These resources provide valuable information tailored to beginners.
Conclusion
Venturing into the world of DIY home repairs and renovations can be an incredibly rewarding experience. In this article, we've highlighted how beginners can start with small, manageable tasks, gradually building up their skills and confidence. By educating yourself and ensuring you have the right tools at hand, even the most novice DIYer can begin making improvements around their home.
In terms of simple DIY repairs, we outlined how to patch a hole in the wall and fix broken tiles, both practical skills that can save you money and time. For those looking to increase the value of their homes, we provided a list of DIY renovation ideas, like updating the kitchen backsplash and building a patio, which can not only enhance your living space but also potentially offer a solid return on investment.
Remember, safety should always be your priority; never undertake a task that seems risky or beyond your skill level. With patience, practice, and a willingness to learn, you can turn your DIY journey into a fulfilling and productive hobby. Don't be afraid to start small and dream big. Happy DIYing!