
Key Takeaways
- Understand the Challenges: Learn about the common challenges of living in small homes and the importance of maximizing available space for better living conditions.
- Effective Planning: Get tips on how to assess and measure your space accurately to determine the best storage solutions before starting any DIY project.
- Under-Stair Storage: Discover step-by-step instructions and creative ideas for building and utilizing under-stair storage to make use of often-overlooked spaces.
- Closet Organization: Explore DIY projects for creating efficient closet organization systems, including shelving, hanging rods, and storage bins to optimize closet space.
- Garage Shelving: Learn how to build sturdy garage shelving to store tools, sports equipment, and seasonal items, effectively creating extra storage space in your garage.
- Vertical Storage Solutions: Find innovative ideas for vertical storage, such as wall-mounted shelves, pegboards, and hanging racks, to save floor space and utilize wall space efficiently.
- Multipurpose Furniture: Get inspired by examples of multipurpose furniture like storage ottomans, beds with drawers, and fold-out desks that combine functionality with style.
- Kitchen Storage Hacks: Discover practical DIY solutions for organizing kitchen cabinets, pantry spaces, and countertops to maximize every inch of your kitchen.
- Bathroom Storage Solutions: Learn creative ways to add storage in small bathrooms, including over-the-toilet shelves, vanity organizers, and shower caddies, to keep the space neat and tidy.
- Living Room Storage Ideas: Get tips on integrating storage into your living room decor with built-in bookcases, storage benches, and hidden compartments that blend functionality with aesthetics.
- Start Your Projects: Be encouraged to start your own DIY projects to maximize space in your small home, bringing together all the innovative storage solutions discussed.
Introduction: The Importance of Maximizing Space in Small Homes
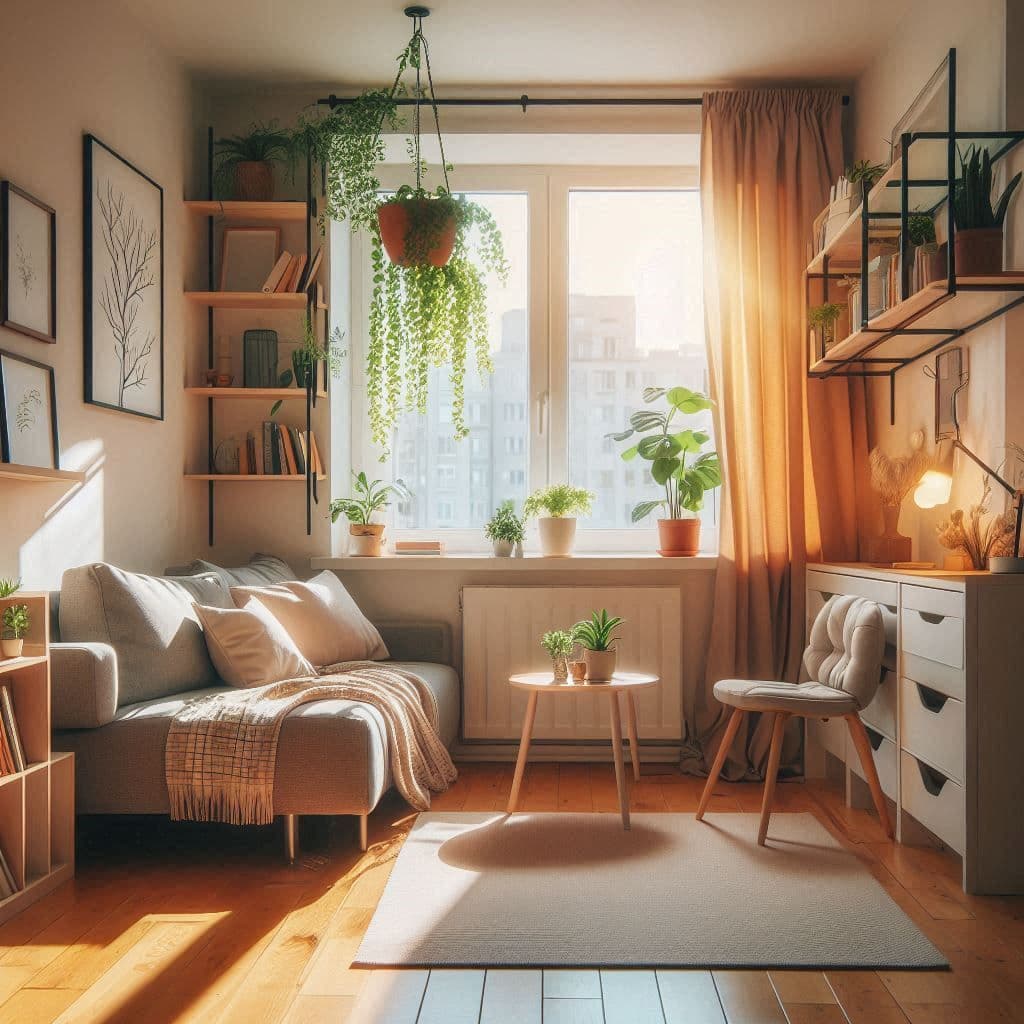
Living in a small home presents a unique set of challenges. Limited space can make it difficult to keep your living area organized and clutter-free, often leading to frustration and a sense of confinement. Small homes typically lack sufficient storage, making it hard to find a place for all your belongings. This can result in overcrowded rooms and a constant struggle to maintain order. However, with the right approach, these challenges can be turned into opportunities to create a more functional and enjoyable living space.
Maximizing available space in a small home offers numerous benefits. First and foremost, it enhances the overall functionality of your living area. Efficient use of space allows you to store more items without overcrowding, making it easier to keep your home tidy and organized. This, in turn, can reduce stress and save time, as you’ll spend less time searching for misplaced items. Additionally, a well-organized home can improve your overall quality of life, providing a sense of calm and order that positively impacts your mental well-being.
Creative and efficient storage solutions are crucial for making the most of a small home. Traditional storage methods often fall short in limited spaces, but innovative DIY projects can transform underutilized areas into valuable storage. For instance, building custom under-stair storage, installing closet organization systems, and creating garage shelving can significantly increase your storage capacity. Vertical storage solutions, such as wall-mounted shelves and pegboards, and multipurpose furniture, like ottomans with hidden compartments, offer stylish yet practical options for small spaces.
By embracing these creative storage solutions, you can turn your small home into a well-organized and comfortable living environment. Whether you’re dealing with a compact apartment or a cozy house, these strategies will help you maximize your space, making your home more functional and enjoyable.
Planning Your Space: Assessing and Measuring
Before diving into any DIY storage project, it’s essential to assess and measure your space accurately. Proper planning ensures that your storage solutions fit perfectly and function effectively, making the most of every inch available.
Tips on How to Assess and Measure Your Space:
- Inventory Your Belongings: Start by listing the items you need to store. This will help you determine the type and amount of storage required.
- Identify Problem Areas: Walk through your home and identify areas that could benefit from better organization or additional storage.
- Visualize the Space: Imagine how different storage solutions could fit into each area. Consider both functional and aesthetic aspects to ensure the solutions blend seamlessly with your decor.
The Importance of Planning Before Starting Any DIY Project:
Planning is crucial for the success of any DIY project. By taking the time to plan, you can avoid common pitfalls such as inadequate space, mismatched materials, or impractical designs. Effective planning helps you:
- Save Time and Money: By knowing exactly what you need and how to execute your project, you can avoid unnecessary purchases and reduce the risk of costly mistakes.
- Ensure Functionality: Thoughtful planning ensures that your storage solutions meet your specific needs and fit well within your space.
- Enhance Aesthetics: Planning allows you to choose designs and materials that complement your existing decor, ensuring a cohesive look.
Tools and Techniques for Accurate Measurement:
- Measuring Tape: A basic yet essential tool for measuring dimensions accurately. Ensure it’s sturdy and long enough for larger spaces.
- Laser Measure: For quick and precise measurements, especially in hard-to-reach areas.
- Level: To ensure your shelves and storage units are perfectly horizontal or vertical.
- Graph Paper and Pencil: Sketch your space to scale on graph paper. This helps visualize the layout and plan the placement of storage solutions.
- Smartphone Apps: Utilize apps designed for home design and measurements to get a digital perspective of your space.
By thoroughly assessing and measuring your space, and planning meticulously, you set the stage for creating effective and aesthetically pleasing storage solutions. This foundational step is vital for transforming your small home into a well-organized and efficient living space.
Utilizing Hidden Spaces
Introduction to Under-Stair Storage
The space beneath a staircase is often underutilized or overlooked, yet it offers a wealth of potential for additional storage. By transforming this hidden area into functional storage, you can significantly increase the available space in your home.
Under-stair storage can be customized to suit your specific needs, whether you require extra shelving, drawers, or a combination of both.
Step-by-Step Guide to Building Under-Stair Storage
- Assess the Space:
- Measure the dimensions of the area under your stairs. Note the height, depth, and width to determine how much space you have to work with.
- Identify any obstructions, such as structural supports, that could impact your design.
- Plan Your Storage:
- Decide on the type of storage you need—shelves, drawers, cabinets, or a combination.
- Sketch a rough design, considering the accessibility and ergonomics of each storage component.
- Gather Materials and Tools:
- Materials: Plywood or MDF for shelves and drawers, brackets, screws, drawer slides, cabinet doors, paint or stain.
- Tools: Saw, drill, screwdriver, measuring tape, level, sander, paintbrushes.
- Build the Framework:
- Cut the plywood or MDF to the dimensions needed for your frame.
- Assemble the frame using screws and brackets, ensuring it fits snugly within the under-stair space.
- Secure the frame to the wall and floor for stability.
- Install Shelves and Drawers:
- Measure and cut shelves to fit within the frame. Install them using brackets and screws.
- For drawers, install drawer slides on the frame and the drawer sides. Attach the drawer fronts last to ensure a clean fit.
- Finish the Storage Units:
- Sand all surfaces to smooth out rough edges.
- Paint or stain the wood to match your home’s decor.
- Install cabinet doors, if included in your design, using hinges and handles.
- Accessorize and Organize:
- Add baskets, bins, or organizers to maximize the functionality of your new storage space.
Creative Ideas for Using This Often-Overlooked Space
- Bookshelves: Create a mini-library with custom bookshelves that fit the unique dimensions of your under-stair area.
- Pull-Out Drawers: Install pull-out drawers of varying sizes for storing shoes, toys, or household items.
- Wine Rack: Design a stylish wine rack to store your wine collection neatly and accessibly.
- Pet Nook: Build a cozy nook for your pet, complete with a bed and storage for their toys and supplies.
- Home Office: Incorporate a small desk and shelves to create a compact home office or study area.
Examples of Under-Stair Storage Solutions
- Open Shelving:
- Utilize open shelving to display decorative items, books, or plants. This keeps the area feeling open and accessible while providing storage.
- Closed Cabinets:
- Install closed cabinets for a cleaner look. These can be used to store items you prefer to keep out of sight, such as cleaning supplies or seasonal decorations.
- Combination Units:
- Combine open shelves and closed cabinets for a versatile storage solution. Use the open shelves for frequently accessed items and the cabinets for hidden storage.
- Drawers:
- Custom-built drawers that pull out from under the stairs are perfect for storing smaller items like shoes, accessories, or office supplies.
- Seating Area with Storage:
- Create a built-in bench with storage underneath. This provides a seating area along with hidden storage, ideal for entryways or living rooms.
By utilizing the space under your stairs, you can create functional and stylish storage solutions that enhance the organization and aesthetics of your home. Whether you opt for simple shelves or intricate custom cabinets, this often-overlooked area can be transformed into a valuable asset for your household.
Closet Organization Systems: Optimizing Closet Space
Importance of Organized Closet Space
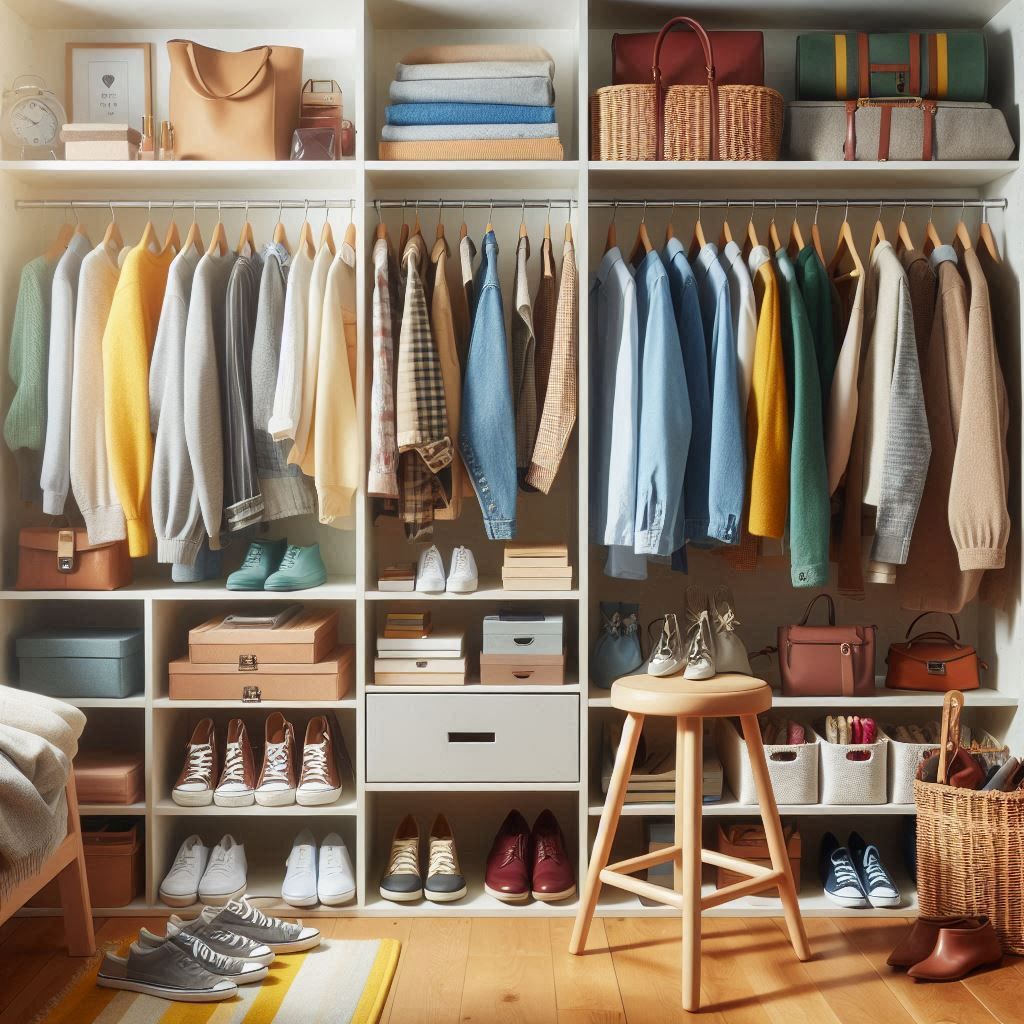
An organized closet space is essential for maintaining a tidy and efficient home. When your closet is well-arranged, it maximizes your storage capacity, making it easier to find and access your belongings.
This can save you time every day and reduce stress associated with clutter. An organized closet also helps keep your clothes in better condition by preventing them from getting wrinkled or damaged due to overcrowding. Ultimately, a well-organized closet contributes to a more streamlined and functional living space.
DIY Projects for Creating Efficient Closet Organization Systems
- Shelving:
Adding shelves to your closet is one of the most effective ways to increase storage and organization. Shelves can be used to store folded clothes, shoes, accessories, and other items.
- Materials Needed: Plywood or MDF, shelf brackets, screws, paint or stain.
- Steps:
- Measure the width and depth of your closet to determine the size of the shelves.
- Cut the plywood or MDF to the desired dimensions.
- Sand the edges for a smooth finish.
- Paint or stain the shelves if desired.
- Install the shelf brackets on the wall, ensuring they are level.
- Place the shelves on the brackets and secure them with screws.
- Hanging Rods:
Hanging rods are essential for storing clothes that need to be hung, such as dresses, suits, and jackets. Adding multiple rods at different heights can maximize vertical space.
- Materials Needed: Closet rods, rod brackets, screws.
- Steps:
- Measure the width of your closet to determine the length of the rods.
- Mark the desired height for the rods on the closet walls. Consider installing one rod higher and one lower to create double hanging space.
- Install the rod brackets on the wall at the marked heights.
- Cut the rods to the appropriate length if necessary.
- Place the rods in the brackets and secure them.
- Storage Bins:
Storage bins are versatile and can be used to store a variety of items, from shoes and accessories to seasonal clothing.
- Materials Needed: Plastic or fabric storage bins, labels (optional).
- Steps:
- Choose storage bins that fit the dimensions of your shelves and the items you need to store.
- Use labels to categorize the contents of each bin, making it easier to find items quickly.
- Arrange the bins on shelves or at the bottom of the closet for easy access.
Cost Estimates and Budgeting: Preparing for Your DIY Storage Projects
Creating efficient storage solutions in your home doesn’t have to break the bank. With careful planning and budgeting, you can enhance your living spaces without compromising on quality. Here’s a breakdown of approximate cost estimates for various DIY storage projects featured in our blog, along with tips on budgeting effectively:
- Under-Stair Storage
• Materials Needed: Plywood, screws, paint, hinges.
• Estimated Cost: $150 - $300
• Budget Tip: Reuse or repurpose materials from previous projects or look for discounts at your local hardware store.
- Closet Organization Systems
• Materials Needed: Shelving units, hanging rods, storage bins.
• Estimated Cost: $100 - $250
• Budget Tip: Consider non-wood alternatives like wire shelving systems, which can be cheaper and just as durable.
- Garage Shelving
• Materials Needed: 2x4 lumber, plywood sheets, screws, brackets.
• Estimated Cost: $200 - $400
• Budget Tip: Buying in bulk can reduce costs significantly, especially for wood and screws. Check for bulk pricing options.
- Vertical Storage Solutions
• Materials Needed: Wall-mounted shelves, pegboards, hanging racks.
• Estimated Cost: $50 - $200
• Budget Tip: DIY your shelving with upcycled materials like old ladders or pallets for a unique and cost-effective solution.
- Multipurpose Furniture
• Materials Needed: Wood, hinges, multipurpose fittings.
• Estimated Cost: $250 - $500
• Budget Tip: Invest in quality materials for moving parts to ensure longevity, but shop around for the best deals on fittings and finishes.
- Kitchen Storage Hacks
• Materials Needed: Pull-out cabinet organizers, spice racks, storage containers.
• Estimated Cost: $75 - $300
• Budget Tip: Use simple DIY solutions like mason jars for storage or install homemade wooden shelves instead of buying prefabricated ones.
7. Bathroom Storage Solutions
• Materials Needed: Over-the-toilet shelves, vanity organizers, shower caddies.
• Estimated Cost: $50 - $150
• Budget Tip: Look for end-of-season sales on bathroom fixtures and accessories for reduced prices.
Budget Planning Tips:
- Assess Your Needs: Before purchasing materials, assess what you actually need to avoid overspending on unnecessary items.
- Shop Smart: Compare prices online and in-store. Consider second-hand options for tools and materials where applicable.
- Track Spending: Keep a detailed record of all expenses to monitor your budget and adjust as needed.
- DIY Where Possible: Labor can be a significant cost in home projects. Where safe and feasible, doing the work yourself can save a considerable amount of money.
By understanding these cost estimates and incorporating effective budgeting strategies, you can tackle your home improvement projects with financial confidence, ensuring that you create functional, stylish spaces in your home without overspending.

Maintenance Tips: Ensuring Longevity and Aesthetics of Your DIY Storage Solutions
After investing time and resources into creating your DIY storage solutions, maintaining them is crucial for both their longevity and visual appeal. Here are some practical tips for the upkeep of various types of storage solutions, along with guidance on how to treat different materials and troubleshoot common issues:
- Wood Storage Solutions (Shelves, Cabinets, Multipurpose Furniture)
- Routine Cleaning: Dust wooden surfaces regularly with a soft, dry cloth to prevent buildup. For deeper cleans, use a damp cloth with mild soap, and dry thoroughly to avoid warping.
- Scratch and Damage Repair: Minor scratches can be filled with a matching wood filler or covered with a touch-up marker. For deeper scratches or chips, sand the area lightly and reapply a matching stain or paint.
- Moisture and Humidity Control: Keep wooden storage solutions away from direct sources of heat and moisture. Use dehumidifiers in damp areas to prevent mold and wood swelling.
- Polishing and Protection: Apply a wood polish or wax every 6-12 months to enhance shine and add a protective layer against scratches and stains.
- Metal Storage Components (Garage Shelving, Hanging Racks)
- Rust Prevention: Periodically check for signs of rust or corrosion, especially in humid environments. Treat any rust spots early with a rust remover and protect with a coat of metal paint or a rust-resistant finish.
- Regular Cleaning: Wipe metal surfaces with a damp cloth and mild detergent. Avoid abrasive materials that can scratch the finish.
- Lubrication: For moving metal parts, such as hinges or sliders in multipurpose furniture, apply a light lubricant like WD-40 to ensure smooth operation and prevent squeaking.
- Plastic and Acrylic Organizers (Kitchen Storage, Bathroom Caddies)
- Stain Removal: Clean plastic surfaces with a solution of water and baking soda to remove stains without causing scratches. For tougher stains, use a diluted bleach solution, but test on a small area first.
- Deep Cleaning: For a thorough clean, dismantle any removable parts and wash with soapy water. Rinse and dry completely before reassembling.
- Scratch Minimization: To minimize scratches on clear acrylic surfaces, use a soft microfiber cloth for cleaning and avoid abrasive cleaners or scrubbers.
4. Upholstered Storage Items (Storage Ottomans, Benches)
- Fabric Care: Vacuum upholstered surfaces regularly to remove dust and debris. Treat spills immediately with an appropriate fabric cleaner, following the manufacturer’s instructions.
- Deep Cleaning: Schedule a professional cleaning annually or as needed, depending on usage, to maintain fabric condition and appearance.
- Protection: Use fabric protectors to repel stains and water damage, especially on frequently used items like storage benches.
- General Maintenance Tips
- Check Fasteners: Regularly inspect screws, brackets, and other hardware to ensure they are tight and secure. Tighten any loose components to maintain stability and prevent damage.
- Adjustments and Alignment: Over time, doors or drawers on storage units may become misaligned. Check and adjust hinges and runners periodically to ensure smooth operation.
- Ventilation: Ensure good air circulation around storage areas to prevent dampness and mold, particularly in enclosed spaces like under-stair storage or closets.
By following these maintenance tips, you can keep your DIY storage solutions looking as good as new and functioning optimally for years to come. Regular upkeep not only preserves the practicality and aesthetics of your storage but also enhances the overall environment of your home.
Tips for Maintaining an Organized Closet
- Regularly Declutter: Go through your closet periodically to remove items you no longer need or wear. Donate, sell, or recycle items that are in good condition.
- Categorize and Group Items: Group similar items together, such as shirts, pants, and accessories. This makes it easier to find what you need and maintain order.
- Use Uniform Hangers: Using the same type of hangers creates a cohesive look and maximizes space. Slim, non-slip hangers are particularly effective for saving space.
- Implement a One-In, One-Out Rule: For every new item you add to your closet, remove an old item. This helps prevent overcrowding and keeps your closet manageable.
- Label Everything: Labels on storage bins and shelves help ensure that everything has a designated place, making it easier to return items to their proper spot.
- Optimize Vertical Space: Use the full height of your closet by installing high shelves for less frequently used items and double hanging rods for more storage.
By implementing these DIY projects and maintenance tips, you can create an efficient and organized closet that enhances your daily routine and keeps your home clutter-free. Investing time in organizing your closet will pay off in the long run, providing a more functional and enjoyable living environment.

Garage Shelving: Creating Extra Storage in the Garage
Maximizing garage space offers numerous benefits that enhance the functionality and organization of your home. A well-organized garage:
- Increases Storage Capacity: By efficiently using vertical and horizontal space, you can store more items without cluttering the floor.
- Improves Accessibility: Proper shelving and organization make it easier to find and access tools, sports equipment, and seasonal items.
- Enhances Safety: Keeping items off the floor reduces tripping hazards and prevents damage to your belongings.
- Optimizes Vehicle Storage: Clearing floor space can provide more room for parking vehicles, protecting them from damage and the elements.
- Adds Value to Your Home: An organized, functional garage can be an attractive feature for potential buyers, adding to your home’s resale value.
Instructions on Building Sturdy Garage Shelving
Building sturdy garage shelving is a practical DIY project that can significantly improve your garage’s storage capabilities. Here’s a step-by-step guide:
Materials Needed:
- 2x4 lumber
- Plywood or MDF sheets
- Wood screws
- L-brackets
- Power drill
- Saw
- Measuring tape
- Level
- Safety gear (gloves, goggles)
Steps:
- Plan and Measure:
- Determine the size and placement of your shelves. Measure the width, height, and depth of the available space.
- Sketch a design, considering the weight and size of the items you’ll store.
- Cut the Lumber:
- Cut the 2x4s to the desired lengths for the shelf supports and legs. Ensure you have enough pieces for the number of shelves you plan to build.
- Cut the plywood or MDF to the dimensions of the shelves.
- Assemble the Frame:
- Construct the frame by attaching the horizontal supports to the vertical legs using wood screws. Use a level to ensure the frame is straight.
- For added stability, attach L-brackets at the corners where the supports meet the legs.
- Attach the Shelves:
- Place the cut plywood or MDF sheets on the horizontal supports.
- Secure the shelves to the supports with wood screws, ensuring they are evenly spaced and level.
- Secure to the Wall (Optional but Recommended):
- For extra stability, anchor the shelving unit to the garage wall using L-brackets and wall anchors.
Storage Ideas for Tools, Sports Equipment, and Seasonal Items
- Tools:
- Pegboards: Install a pegboard on the wall above your workbench for hanging frequently used tools. Use hooks and bins to organize smaller items like screws and nails.
- Tool Racks: Add tool racks for larger tools such as shovels, rakes, and brooms. These can be mounted on the wall or built into the shelving unit.
- Sports Equipment:
- Ball Bins: Use large, open bins or mesh containers for storing balls and other sports equipment. Label the bins for easy identification.
- Hooks and Shelves: Install hooks for hanging bikes, helmets, and other gear. Dedicated shelves can be used for smaller items like gloves and water bottles.
- Seasonal Items:
- Clear Storage Bins: Store seasonal decorations, camping gear, and holiday items in clear plastic bins. Label each bin and stack them on the upper shelves where they are out of the way but still accessible.
- Overhead Storage: Utilize ceiling-mounted racks for storing bulky seasonal items like holiday decorations, camping gear, or off-season sports equipment. This keeps them off the floor and out of the way.
By building sturdy garage shelving and implementing these storage ideas, you can transform your garage into a well-organized, functional space. This will not only make it easier to find and access your items but also create a safer and more efficient environment for your everyday activities.
Vertical Storage Solutions: Going Up Instead of Out
Advantages of Vertical Storage
Vertical storage solutions offer numerous benefits that enhance the efficiency and aesthetics of your living space. By utilizing vertical space, you can:
- Maximize Floor Space: Free up valuable floor space, making rooms feel larger and less cluttered.
- Increase Storage Capacity: Use wall space to store items, allowing for more storage without expanding your room's footprint.
- Enhance Accessibility: Keep frequently used items within easy reach while storing less-used items higher up.
- Improve Organization: Categorize and arrange items vertically, making it easier to find what you need.
- Create Visual Appeal: Add decorative elements to your walls and create a more visually interesting and dynamic space.
Innovative Ideas for Vertical Storage
- Wall-Mounted Shelves:
Wall-mounted shelves are a versatile and stylish way to utilize vertical space. They can be installed in any room and used for a variety of purposes.
- In the Living Room: Use floating shelves to display books, photos, and decorative items.
- In the Kitchen: Install shelves above countertops or near the stove to store spices, cookbooks, and kitchen tools.
- In the Bathroom: Add shelves above the toilet or next to the vanity to store toiletries, towels, and decorative items.
- Pegboards:
Pegboards offer a flexible and customizable storage solution. They can be used to organize tools, craft supplies, and kitchen utensils.
- In the Garage: Mount a pegboard on the wall to hang tools, gardening equipment, and small hardware items. Use hooks, baskets, and shelves to create a tailored storage system.
- In the Home Office: Use a pegboard above your desk to keep office supplies, such as scissors, pens, and notepads, organized and within easy reach.
- In the Kitchen: Install a pegboard on a kitchen wall to hang pots, pans, and utensils, freeing up drawer and cabinet space.
- Hanging Racks:
Hanging racks are ideal for storing items vertically, especially in closets and kitchens.
- In the Closet: Use hanging racks to store shoes, bags, and accessories. Install a hanging rod with multiple levels to maximize clothing storage.
- In the Kitchen: Hang pots, pans, and cooking utensils from a ceiling-mounted rack or wall-mounted hooks to save cabinet space and keep items easily accessible.
- In the Laundry Room: Install a hanging rack for drying clothes or storing cleaning supplies. Wall-mounted baskets can also be used for additional storage.
Examples of Vertical Storage Solutions
- Living Room Gallery Wall: Combine wall-mounted shelves with framed artwork and photos to create a functional and visually appealing gallery wall. Use the shelves to display books, plants, and decorative objects.
- Bathroom Ladder Shelf: A ladder-style shelf leaning against the wall provides a stylish and practical storage solution for towels, toiletries, and decorative items.
- Kitchen Pegboard Wall: Install a large pegboard on a kitchen wall to hang pots, pans, and utensils. Customize it with shelves and baskets for spices, cookbooks, and other kitchen essentials.
- Garage Tool Wall: Use a combination of pegboards and wall-mounted shelves to organize tools and gardening supplies. Add labeled bins and hooks for smaller items.
By incorporating vertical storage solutions like wall-mounted shelves, pegboards, and hanging racks, you can make the most of your available space, enhance organization, and create a more functional and aesthetically pleasing environment.

Multipurpose Furniture: Combining Functionality with Style
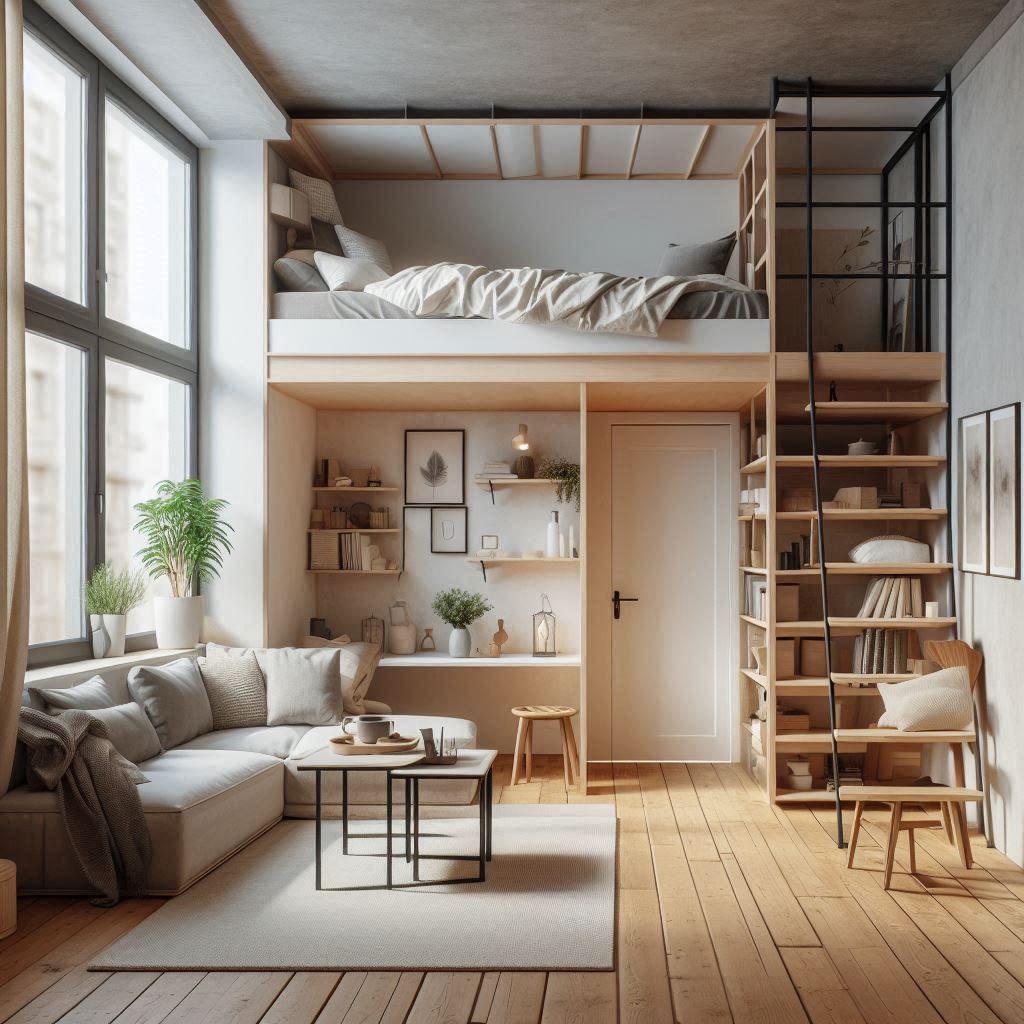
In today’s compact living environments, maximizing space without sacrificing style is a common challenge.
Multipurpose furniture offers an ingenious solution by combining multiple functions into a single piece. This type of furniture is designed to fulfill various needs, making it ideal for small apartments, homes with limited space, or anyone looking to declutter and streamline their living areas.
Multipurpose furniture not only saves space but also reduces the need for multiple pieces, contributing to a cleaner, more organized, and aesthetically pleasing environment.
Examples of Multipurpose Furniture
- Storage Ottomans: Storage ottomans are a quintessential example of multipurpose furniture. They serve as comfortable seating, footrests, and hidden storage units.
- Functionality: The top of the ottoman can be removed to reveal storage space inside, perfect for stashing blankets, magazines, or remote controls.
- Style: Available in various shapes, sizes, and materials, storage ottomans can complement any decor, from modern to traditional.
- Beds with Drawers: Beds with built-in drawers are perfect for maximizing bedroom storage without adding extra furniture.
- Functionality: Drawers integrated into the bed frame provide ample space for storing clothes, linens, or other bedroom essentials, freeing up closet and floor space.
- Style: These beds come in a range of designs, from sleek, minimalist frames to more ornate, traditional styles, allowing you to choose one that fits your bedroom decor.
3. Fold-out Desks: Fold-out desks are ideal for creating a functional workspace in small areas.
- Functionality: When not in use, the desk folds up against the wall, taking up minimal space. When needed, it folds out to provide a sturdy work surface.
- Style: Fold-out desks can be modern and minimalist or more decorative, with options to match various interior styles. Some even include additional storage solutions like shelves or drawers.
Tips for Choosing the Right Multipurpose Furniture
- Assess Your Needs: Determine what functions you need the furniture to serve. For example, if you need extra storage and seating, a storage ottoman might be ideal. If you need a workspace that can disappear when not in use, consider a fold-out desk.
- Measure Your Space: Before purchasing, measure the area where the furniture will be placed to ensure it fits well and doesn’t overcrowd the space. Consider both the footprint and the height of the piece.
- Consider Style and Aesthetics: Choose furniture that complements your existing decor. Multipurpose furniture should blend seamlessly with your style rather than stand out as an awkward addition.
- Quality and Durability: Since multipurpose furniture often serves multiple roles, it’s crucial to choose pieces made from durable materials that can withstand regular use. Look for sturdy construction and high-quality finishes.
- Ease of Use: Select furniture that is easy to convert or use in its various functions. For instance, a fold-out desk should be simple to fold up and down, and a storage ottoman should have a lid that’s easy to lift.
By incorporating multipurpose furniture into your home, you can create a more efficient, organized, and stylish living space. These versatile pieces help you make the most of your available space while enhancing the overall functionality and aesthetic of your home.

Kitchen Storage Hacks: Maximizing Every Inch
Efficient kitchen storage is crucial for maintaining a functional, organized, and enjoyable cooking space. A well-organized kitchen:
- Enhances Efficiency: Streamlines meal preparation and cooking by keeping essential items within easy reach.
- Reduces Clutter: Prevents countertops and cabinets from becoming overcrowded, creating a more pleasant and workable environment.
- Saves Time: Makes it easier to find ingredients, cookware, and utensils, reducing the time spent searching for items.
- Improves Safety: Reduces the risk of accidents by keeping sharp objects and heavy items properly stored.
- Maximizes Space: Utilizes every inch of available space, making even small kitchens feel more spacious and functional.
DIY Solutions for Organizing Kitchen Cabinets, Pantry Spaces, and Countertops
- Organizing Kitchen Cabinets:
- Pull-Out Shelves: Install pull-out shelves or sliding trays in lower cabinets to make it easier to access items at the back. These can be DIY-installed using pre-made kits or custom-built.
- Tiered Shelf Organizers: Use tiered shelf organizers to maximize vertical space in cabinets. These are especially useful for spices, canned goods, and small containers.
- Door-Mounted Racks: Attach racks or hooks to the inside of cabinet doors for storing pot lids, cutting boards, or cleaning supplies. This frees up shelf space and keeps items easily accessible.
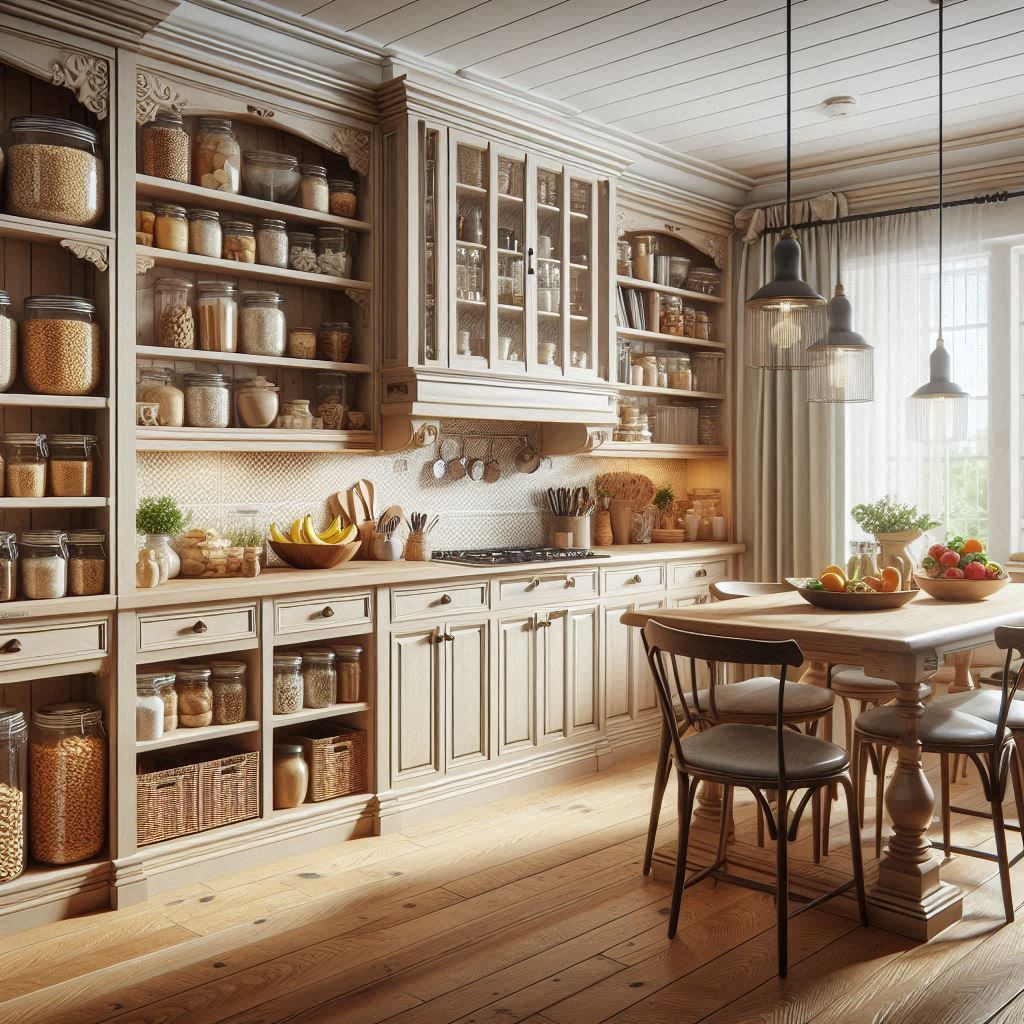
- Organizing Pantry Spaces:
- Clear Containers: Store dry goods like pasta, rice, and cereals in clear, airtight containers. This not only keeps food fresh but also makes it easy to see what you have at a glance.
- Labels: Label containers and shelves to create a system that is easy to maintain and follow. This helps everyone in the household know where items belong.
- Adjustable Shelving: Install adjustable shelving to accommodate items of various heights. This allows you to customize the space as your storage needs change.
- Over-the-Door Organizers: Use over-the-door organizers for additional storage of small items, such as seasoning packets, snacks, and kitchen wraps.
- Organizing Countertops:
- Magnetic Knife Strips: Mount a magnetic knife strip on the wall to keep knives off the counter and within easy reach. This also prevents knives from getting dull or damaged in a drawer.
- Under-Cabinet Hooks: Install hooks or rails under cabinets to hang mugs, utensils, or small pots. This frees up counter space and keeps frequently used items accessible.
- Appliance Garages: Create an appliance garage by installing a small cabinet or roll-up door on the countertop to hide small appliances like toasters, blenders, and coffee makers when not in use.
- Lazy Susans: Use a lazy Susan on the countertop or in cabinets to make it easier to access items in the back.
Tips for Maintaining an Organized Kitchen
- Regular Decluttering: Periodically go through your kitchen items and get rid of anything you no longer use or need. Donate, recycle, or discard items to keep your kitchen clutter-free.
- Zone Organization: Organize your kitchen into zones based on activities, such as a cooking zone, baking zone, and coffee station. Keep related items together to streamline tasks.
- Daily Maintenance: Spend a few minutes each day tidying up your kitchen. Put away items after use, wipe down countertops, and ensure everything is in its designated place.
- Utilize Vertical Space: Make use of wall space, backsplashes, and the inside of cabinet doors to add extra storage options. Shelves, hooks, and magnetic strips are great for this purpose.
- Consistency: Maintain the organization systems you’ve put in place. Consistency is key to keeping your kitchen organized in the long run.
By implementing these DIY solutions and tips, you can maximize every inch of your kitchen, making it a more efficient, organized, and enjoyable space for cooking and socializing.
Bathroom Storage Solutions: Keeping it Neat and Tidy
Challenges of Small Bathroom Storage
Small bathrooms often present significant storage challenges due to their limited space. Common issues include:
- Limited Surface Area: Countertops and shelves are often too small or nonexistent, making it hard to store daily essentials.
- Inadequate Cabinets: Many small bathrooms lack sufficient cabinet space for storing toiletries, towels, and cleaning supplies.
- Overcrowding: Limited storage options can lead to cluttered surfaces and a disorganized appearance.
- Accessibility: Items can become hard to reach and retrieve if not stored properly, leading to frustration and inefficiency.
- Aesthetic Concerns: Keeping a small bathroom tidy and visually pleasing while ensuring functionality can be difficult.
Creative Ways to Add Storage in Small Bathrooms
- Over-the-Toilet Shelves: Over-the-toilet shelves are a fantastic way to utilize vertical space in a small bathroom.
- Functionality: These shelves provide additional storage for towels, toiletries, and decorative items without taking up valuable floor space.
- Style: Available in various styles and materials, they can complement any bathroom decor. Options range from simple metal racks to more elaborate wooden cabinets.
- Vanity Organizers: Vanity organizers help keep bathroom essentials neatly arranged and easily accessible.
- Functionality: Drawer dividers, trays, and tiered organizers can be used to sort makeup, hair accessories, and grooming tools. Under-sink organizers maximize the space below the vanity.
- Style: Choose organizers that match your vanity's style and color scheme to maintain a cohesive look. Clear acrylic organizers are versatile and blend well with most decor.
- Shower Caddies: Shower caddies provide convenient storage for bath products within the shower or bathtub area.
- Functionality: Options include over-the-showerhead caddies, corner shelves, and suction cup-mounted baskets. These keep shampoos, conditioners, soaps, and razors organized and within reach.
- Style: Stainless steel or plastic caddies are durable and easy to clean. Choose a style that coordinates with your shower fixtures and overall bathroom design.
Tips for Keeping Bathroom Storage Neat and Tidy
- Declutter Regularly: Periodically go through your bathroom items and discard or donate anything you no longer use. Expired products, old makeup, and unused toiletries should be removed to free up space.
- Use Clear Containers: Store small items in clear containers or bins to easily see their contents. This helps maintain organization and prevents items from getting lost in drawers or cabinets.
- Label Everything: Label shelves, bins, and containers to create a clear system for where items belong. This helps everyone in the household know where to put things back after use.
- Maximize Vertical Space: Utilize wall space for additional storage by installing shelves, hooks, or towel bars. Over-the-door organizers can also provide extra storage for items like hair tools and cleaning supplies.
- Keep Countertops Clear: Store frequently used items in accessible containers or trays, but avoid overcrowding the countertop. Aim to keep the surface as clear as possible for a tidy appearance.
- Invest in Multi-functional Furniture: Consider furniture pieces that offer multiple functions, such as a vanity with built-in storage or a mirrored cabinet. These can help maximize space without adding clutter.
- Consistency is Key: Develop a routine for putting items back in their designated places after use. Consistent habits will help maintain a neat and organized bathroom over time.
By addressing the challenges of small bathroom storage with creative solutions like over-the-toilet shelves, vanity organizers, and shower caddies, and following tips to keep the space tidy, you can transform even the smallest bathroom into an organized, efficient, and stylish oasis.
Living Room Storage Ideas: Blending Storage with Decor
The living room is often the heart of the home, serving as a space for relaxation, entertainment, and socializing. As such, maintaining a clutter-free and aesthetically pleasing environment is essential. Integrating storage into living room decor is crucial because:
- Enhances Functionality: Proper storage solutions ensure that items like books, electronics, and decorative pieces are organized and easily accessible.
- Promotes Cleanliness: Reducing clutter helps maintain a tidy and inviting space, making it easier to clean and keep organized.
- Improves Aesthetics: Thoughtfully designed storage solutions can complement the room's decor, adding to the overall visual appeal.
- Maximizes Space: Efficient storage solutions can make the most of available space, especially in smaller living rooms, by utilizing every inch effectively.
Tips on Incorporating Storage into Your Living Room
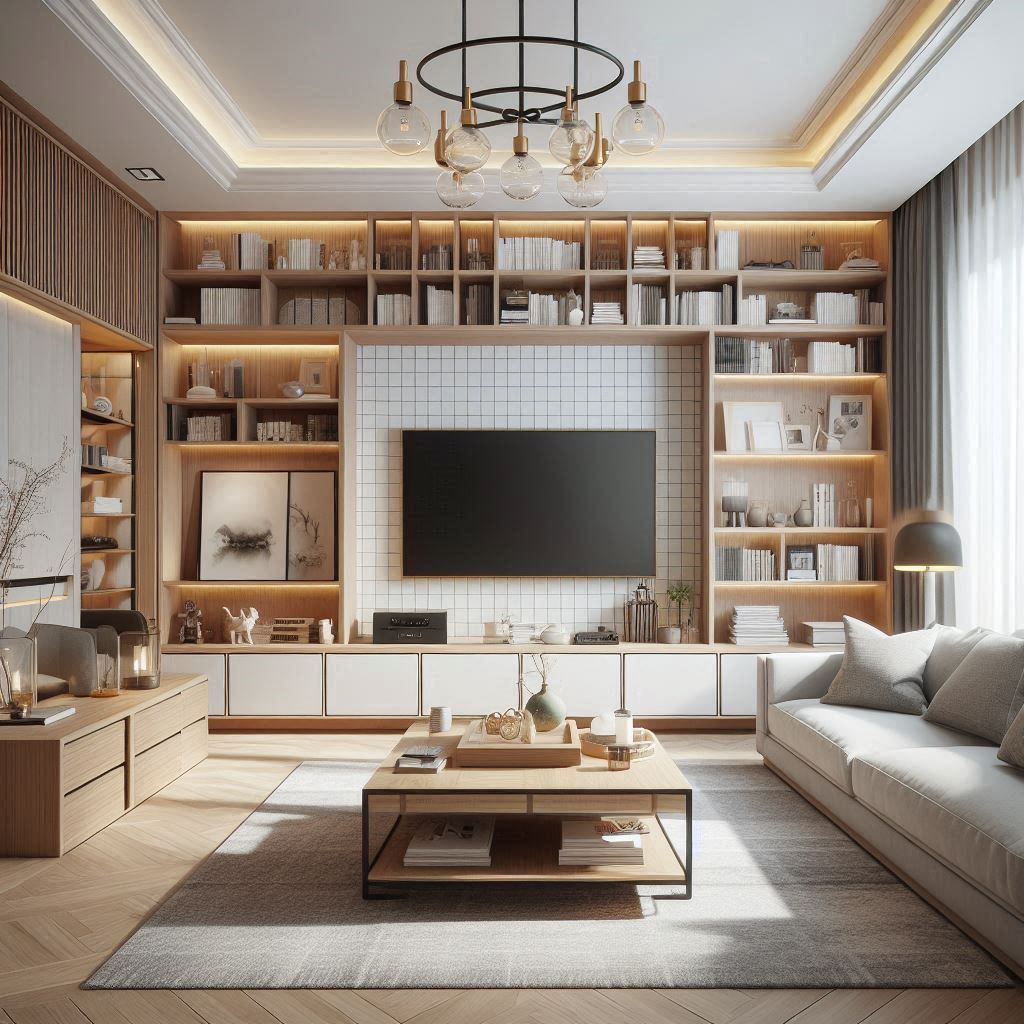
- Built-in Bookcases: Built-in bookcases are an excellent way to add both storage and style to your living room.
- Functionality: They provide ample space for books, photo albums, and decorative items. Built-ins can also be customized to fit the exact dimensions of your room, maximizing storage potential.
- Style: Built-in bookcases can be designed to match the room's decor, whether you prefer a modern, minimalist look or a more traditional, ornate style. They can be painted to blend seamlessly with the walls or stand out as a focal point.
- Storage Benches: Storage benches are versatile pieces that offer seating and storage in one.
- Functionality: These benches typically have a hinged top that opens to reveal storage space inside, perfect for blankets, pillows, or toys. They can be placed against a wall, under a window, or at the foot of a sofa.
- Style: Available in various materials and designs, storage benches can complement any living room decor. Upholstered benches add a touch of softness and comfort, while wooden benches can provide a rustic or contemporary feel.
- Hidden Compartments: Furniture with hidden compartments can keep your living room looking tidy by concealing storage.
- Functionality: Coffee tables, ottomans, and side tables with hidden compartments can store items like remote controls, magazines, and board games out of sight but within easy reach.
- Style: These pieces often feature sleek, minimalist designs that blend seamlessly with modern decor. They provide a clean, uncluttered look while still offering practical storage.
Examples of Stylish and Functional Living Room Storage Solutions
- Multifunctional Coffee Tables: Coffee tables with built-in storage compartments or lift tops offer a discreet place to store everyday items. For example, a coffee table with drawers or a lift-top can hide remotes, coasters, and other small items, keeping the surface clear.
- Floating Shelves: Floating shelves provide a minimalist storage solution that can be used to display decorative items, books, or plants without taking up floor space. They can be arranged in creative patterns to add visual interest to the walls.
- Media Consoles: A media console with ample storage options, such as drawers, cabinets, and open shelving, can house electronics, DVDs, and other media accessories. Choosing a console that matches your decor ensures it enhances the room's aesthetic while keeping things organized.
- Decorative Baskets and Bins: Stylish baskets and bins can be placed on shelves, under coffee tables, or beside sofas to store items like throws, magazines, or toys. Opt for designs that complement your decor, such as woven baskets for a boho look or sleek metal bins for a modern touch.
By thoughtfully incorporating storage solutions that blend with your living room decor, you can create a space that is both functional and visually appealing. These ideas help maintain a tidy, organized environment while enhancing the overall aesthetic of your living room.
Conclusion: Bringing It All Together
Creative storage solutions are essential for maintaining an organized, functional, and aesthetically pleasing home, especially in small spaces where every inch counts. By integrating storage seamlessly into your decor, you can enhance the usability of your living areas without sacrificing style.
Whether it's through built-in bookcases in the living room, over-the-toilet shelves in the bathroom, or pull-out shelves in the kitchen, thoughtful storage solutions can transform cluttered spaces into efficient, beautiful environments.
We encourage you to start your own DIY projects to tackle storage challenges in your home. With a bit of creativity and effort, you can design and implement storage solutions that not only meet your practical needs but also reflect your personal style. From repurposing furniture to installing custom shelves, the possibilities are endless.
Maximizing space in small homes requires a strategic approach, but the rewards are well worth it. By utilizing vertical space, incorporating multi-functional furniture, and maintaining consistent organizational habits, you can create a home that feels spacious, comfortable, and inviting. Embrace the journey of optimizing your living spaces and enjoy the benefits of a well-organized and stylish home.