Plan Your Bump-Out Addition: Step-by-Step Guide
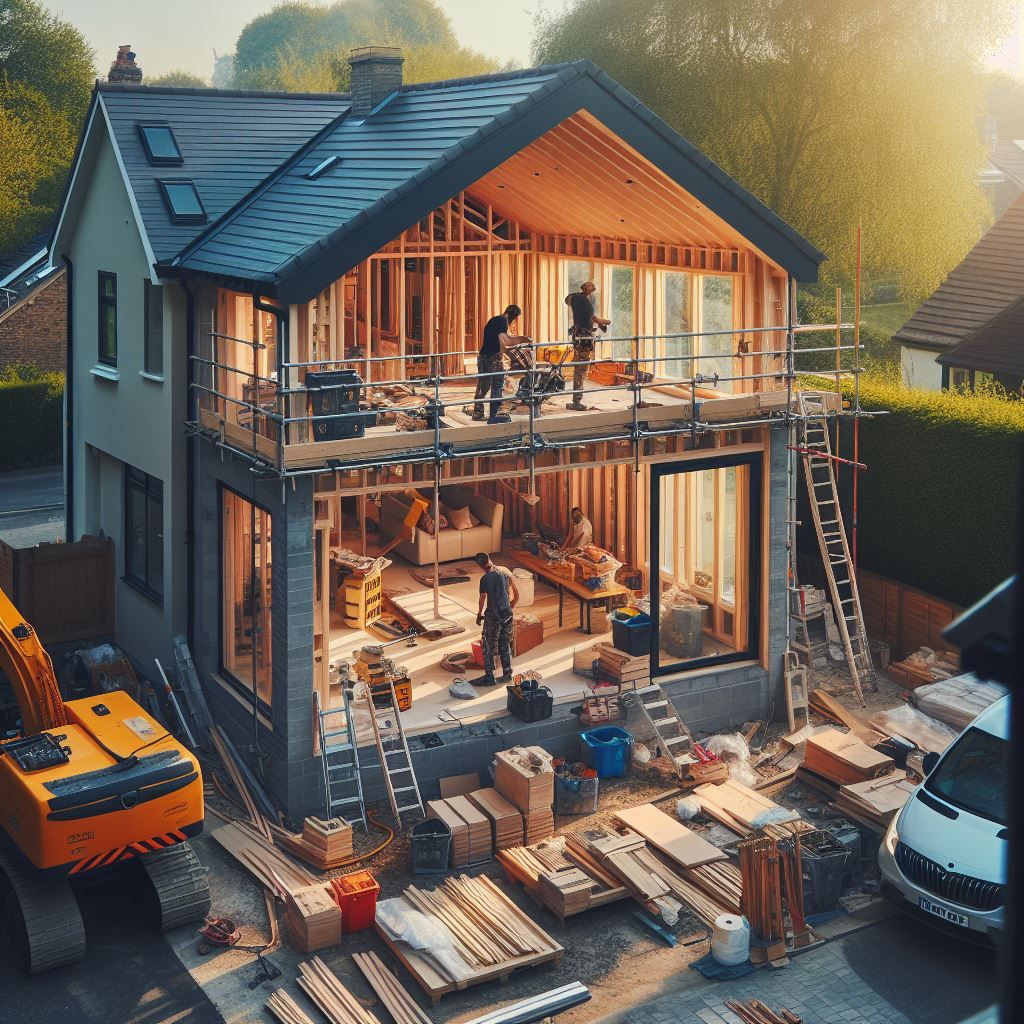
A well-planned and executed bump-out addition can add considerable value to your home

Table of Contents
- Introduction
- Safety and Code Considerations
- Preparing for a Bump-Out Addition
- Step-by-Step Guide to Building a DIY Bump-Out Addition
- Detail the Planning Process
- DIY vs. Hiring a Professional: Making the Right Choice
- Cost Breakdown of a Bump-Out Home Addition
- Detailed Cost Factors
- Common Pitfalls in Planning and Executing a Bump-Out Addition
- Frequently Asked Questions8. Conclusion
Key Takeaways
- Bump-out additions are cost-effective solutions to adding space to your home without a full-scale renovation.
- Initial planning stages involve identifying the need, choosing the right location, and designing the space.
- Safety and building code considerations are paramount. Always check local regulations and obtain necessary permits.
- Detailed step-by-step guidance can provide homeowners with the confidence to undertake a DIY bump-out addition.
- However, hiring a professional might be more suitable for complex projects or those with less DIY experience.
- Costs for a bump-out addition can vary widely based on size, materials, and whether you choose DIY or professional services. Always budget for unexpected expenses.
- Common questions revolve around planning, execution, costs, and troubleshooting during the bump-out addition project.
- The article aims to provide comprehensive guidance on bump-out additions, helping homeowners make informed decisions.
Introduction
Home improvement projects come in all shapes and sizes, but one of the most transformational can be the addition of a bump-out. A bump-out addition is a smaller-scale extension that adds extra square footage to a specific room, providing a cost-effective solution to enhance your living space without a full-scale renovation. Think of it as an oversized bay window that can augment your kitchen, living room, or bedroom, offering the much-needed space for an eat-in area, a reading nook, or a walk-in closet.
If you've been feeling the pinch of a cramped home, this guide will walk you through the ins and outs of planning, executing, and managing the costs of a DIY bump-out addition. We'll tackle essential safety and building code considerations, weigh the pros and cons of DIY vs. hiring a professional, and provide a detailed, step-by-step guide to help you navigate this exciting home improvement journey.
Whether you're an experienced DIY-er or a home improvement novice, this comprehensive guide aims to equip you with all the knowledge needed to successfully carry out a bump-out addition to your home. Let's turn your dream into a reality and create the space you've always wished for!
Safety and Code Considerations
When planning and executing a bump-out addition, safety and building code adherence are paramount. These regulations exist to ensure that the physical structure of your home remains safe and reliable for years to come. Here are some important aspects to consider:
1. Building Codes:
Building codes vary depending on your location, so the first step is to familiarize yourself with the local codes and regulations. These codes will determine things like the minimum size of the rooms, the height of the ceilings, the number and placement of electrical outlets, and many other factors. They also often dictate the type of materials that can be used based on local climate and geological conditions. It's essential to research and adhere to these guidelines to ensure that your bump-out addition meets legal requirements.
2. Permits:
In most cases, you'll need a permit to add a bump-out to your home. This process involves submitting your building plans to a local authority for review. Once approved, the permit ensures that your project is legal and that it follows local building codes. This is not a step to be skipped; doing so can result in fines and may even require you to undo your hard work.
3. Safety Measures:
Safety should be your utmost priority during the construction process. This includes ensuring the proper use of tools, wearing appropriate protective gear, and following best practices when working with electrical and plumbing systems.
For example, a common safety concern when building a bump-out addition is the potential for structural instability. If the new addition is not properly supported, it can result in severe damage to your home and pose a significant safety risk. To address this, it's crucial to ensure that the bump-out is structurally sound – this involves creating a secure foundation, properly attaching it to the existing structure, and ensuring load-bearing walls are adequately supported.
Another critical safety measure is to avoid overloading electrical circuits when adding new outlets or fixtures in your bump-out addition. Overloaded circuits can lead to an electrical fire. Always consult with an electrician or adhere to local codes when adding to your home's electrical system.
Furthermore, if you are not comfortable or experienced with certain aspects of the construction, such as electrical wiring or plumbing, it may be safer to hire a professional. Remember, while the goal is to expand your home, it should never come at the cost of personal safety or the structural integrity of your home.
It's essential to understand your local building codes, obtain the necessary permits, and prioritize safety during construction. Taking these steps will help ensure the success of your bump-out addition project and the safety of your home for years to come.
Preparing to Add a Bump-Out Addition
Adding a bump-out addition to your home requires careful planning and preparation. Here are the key steps to ensure a successful project.
1. Identify the Need: The first step is to identify the need for the addition. Do you require more space in your kitchen? Do you want a dedicated reading corner in your living room? Or perhaps you're dreaming of a walk-in closet in your master bedroom? Once you've identified the need, you can start planning the specifics of the project.
2. Choose the Right Location: The location of your bump-out addition is crucial. It should be strategically placed to maximize the benefits, considering factors such as the flow of the house, the available outdoor space, and the structural feasibility. For instance, if you're planning to extend your kitchen, consider the impact on the outdoor space, the view from the kitchen, and how it will affect the natural light entering your home.
3. Design the Space: This is the most creative step in the process. It involves deciding on the size, shape, and interior layout of the bump-out addition. Sketch out your ideas or use home design software to visualize the end result. Consider how the new space will blend with the existing structure in terms of architectural style and interior design.
4. Plan for Utilities: If your bump-out addition involves adding or moving electrical outlets, plumbing fixtures, or HVAC components, it's important to plan this in the early stages. This could significantly impact the cost and complexity of the project. Always consult with a professional if you're unsure about these aspects.
5. Budgeting: Once you have a clear idea of what your bump-out addition will entail, it's time to determine a budget. This should include costs for materials, labor (if you're hiring professionals), permits, and a contingency for unexpected expenses. Remember, it's better to overestimate costs and be pleasantly surprised than the other way around.
6. Check Building Codes and Obtain a Permit: As discussed earlier, you'll need to check with your local building authority to understand the relevant building codes and obtain the necessary permits. This is a critical step to ensure your project is compliant and legal.
7. Hire Professionals or DIY: Depending on the complexity of the project and your level of expertise, you might choose to do it yourself or hire professionals. If you decide to hire professionals, get multiple quotes and check references to ensure you're working with a reputable contractor.
Adding a bump-out addition to your home is an exciting home improvement project that can significantly enhance your living space. By careful planning, adhering to building codes, and considering safety, you can ensure a successful and satisfying project. Whether you're planning a cozy reading nook or a spacious kitchen extension, a bump-out addition can make a big impact on your home's functionality and value.
Step-By-Step Guide to Build a DIY Bump-Out Addition
Building a bump-out addition yourself can be a rewarding but complex project. Here's a detailed, step-by-step guide to help you navigate the process.
Step 1: Design and Plan
Start by finalizing the design and layout of your bump-out addition. Sketch out your design or use a home design software tool for this purpose. Consider the size, shape, and interior layout of the addition, as well as how it will blend with the existing structure.
Step 2: Check Building Codes and Obtain Permits
Next, check with your local building authority regarding any required permits and building code regulations. Submit your plans for review and obtain the necessary permits before beginning construction.
Step 3: Prepare the Site
Once you have the necessary permits, prepare the site for construction. This involves marking out the area for the new addition and clearing any obstacles. Depending on the location and size of the bump-out, you may need to remove siding or cut into the existing exterior wall.
Step 4: Build the Foundation
The next step is to build the foundation for your bump-out. This usually involves digging footings, setting up forms, and pouring concrete. Ensure the foundation is level and adequately supports the projected weight of the new structure.
Step 5: Frame the Walls
With the foundation in place, you can begin framing the walls of your bump-out addition. This involves cutting and assembling the wall studs, top and bottom plates, and sheathing. Make sure to include openings for windows and doors in your framing plan.
Step 6: Attach the Bump-Out
Once the walls are framed, you can attach the bump-out to the existing structure. This step involves securing the new wall frames to the existing walls and ensuring they are plumb and square.
Step 7: Install the Roof
The roof of your bump-out will either tie into your existing roof or be a separate structure, depending on your design. Install the roof trusses or rafters, then sheathe the roof and apply roofing paper and shingles.
Step 8: Install Windows and Doors
Next, install the windows and doors in your bump-out addition. Make sure to properly insulate and seal around these features to prevent drafts and moisture intrusion.
Step 9: Run Electrical and Plumbing
If your design includes electrical outlets, lighting, or plumbing fixtures, you'll need to run the necessary wiring and pipes at this stage.
Step 10: Insulate and Drywall
Once the electrical and plumbing are in place, you can insulate the walls, floor, and ceiling of your bump-out addition. After the insulation is installed, cover the walls and ceiling with drywall.
Step 11: Finish the Interior
The final step is to finish the interior of your bump-out addition. This includes painting or wallpapering the walls, installing flooring, and adding trim and other finishing touches.
Step 12: Inspect and Enjoy
After you've finished the interior, have your work inspected according to local regulations. Once everything is approved, you can enjoy your new bump-out addition!
Remember, this is a general guide and your project may require additional or different steps based on your specific design and local building codes. Always prioritize safety when undertaking a DIY project of this scale, and don't hesitate to consult with a professional if you encounter any issues or uncertainties. Good luck with your project!
Detail the Planning Process
Assessing the Impact on Property Value
Before embarking on a bump-out addition project, it's crucial to understand its potential impact on your home's value. A well-designed and executed addition can significantly enhance property value, particularly if it adds functional living space, such as a master suite or an expanded kitchen. Consult with a real estate professional or an appraiser to get an estimate of the addition's value relative to its cost. Consider local market trends and how similar improvements have affected home prices in your area. This assessment will help you make an informed decision about the scale and nature of your project.
Blending the Addition with the Home's Aesthetic
A key challenge in designing a bump-out addition is ensuring it harmonizes with the existing structure's architectural style and aesthetic. Start by examining the design elements of your home, such as roof lines, window styles, and exterior materials. Your goal should be to make the addition look like it was always part of the original structure rather than an afterthought.
- Exterior Consistency: Choose materials and finishes that match or complement your home's existing exterior. This might involve sourcing matching bricks or siding, replicating window styles, and matching roofing materials.
- Interior Flow: Inside, the transition between the old and new spaces should be seamless. Pay attention to flooring, wall finishes, and molding styles to ensure consistency throughout. Consider how natural light will flow between spaces and look for opportunities to create visual connections through the use of similar color palettes, materials, and architectural details.
Tips for Space Utilization
Maximizing the utility and comfort of your new space requires thoughtful planning. Here are some tips for effective space utilization in your bump-out addition:
- Define the Purpose: Clearly define the primary function of the new space. Whether it's for dining, relaxing, working, or storage, the intended use should guide the design and layout decisions.
- Flexible Design: Consider incorporating flexible design elements that allow the space to serve multiple purposes over time. For example, built-in shelving and storage can be designed to accommodate a variety of uses, from a home office to a guest room.
- Natural Light and Views: Position windows and glass doors to take advantage of natural light and scenic views. Thoughtfully placed windows can make the space feel larger and more inviting.
- Furniture Placement: Plan the layout with furniture placement in mind. Ensure there is enough room for movement and that the space does not feel cramped. Use furniture and décor to create distinct zones within the bump-out for different activities, if needed.
- Integrate Technology: Consider the integration of modern technology. Plan for sufficient electrical outlets, lighting options, and connectivity to make the space functional and comfortable for today's needs.
By carefully considering these aspects during the planning stage, you can ensure your bump-out addition not only adds valuable space to your home but also enhances its overall appeal and functionality.
DIY vs. Professional Comparison for Bump-Out Additions
Deciding whether to DIY or hire a professional for your bump-out addition involves weighing the satisfaction of completing a project independently against the peace of mind that comes with professional guarantees. Here’s a more nuanced look at both options:
Pros of DIY:
- Cost Savings: Handling the project yourself can save on labor costs, making the addition more affordable.
- Personal Satisfaction: Completing a home improvement project on your own can provide a sense of accomplishment and personal satisfaction.
- Flexibility: DIY projects can be scheduled around your availability, allowing for more flexibility in project timelines.
Cons of DIY:
- Stress and Time Consumption: DIY projects can be more time-consuming and stressful than anticipated, especially for those with limited experience.
- Risk of Mistakes: Without the expertise of a professional, there’s a higher risk of mistakes that can compromise the quality and safety of the addition.
- No Guarantees: DIY projects don’t come with professional guarantees. If something goes wrong, the cost of fixing it falls on you.
Pros of Hiring Professionals:
- Expertise and Experience: Professionals bring a wealth of knowledge, ensuring the job is done correctly and up to code.
- Efficiency: With a team of skilled workers, professionals can complete the project more quickly and efficiently than a DIY approach.
- Guarantees and Warranties: Most professionals offer guarantees on their work, providing peace of mind that any issues will be addressed.
Cons of Hiring Professionals:
- Higher Costs: Professional services come at a cost, which can significantly increase the overall expense of the project.
- Finding the Right Contractor: The process of vetting and selecting a reliable contractor can be time-consuming and challenging.
- Less Personal Involvement: Hiring professionals means less hands-on involvement in the project, which may be a downside for those looking to be closely involved in every aspect.
In conclusion, the choice between DIY and hiring a professional depends on various factors, including your budget, skills, and the complexity of the project. If you're considering a DIY bump-out addition, it's crucial to assess your abilities realistically and understand the time and effort required. If you're leaning towards hiring a professional, take the time to vet potential contractors carefully to ensure they're a good fit for your project.
Cost Breakdown for a Bump-Out Home Addition
The cost of a bump-out home addition can vary significantly based on several factors, including the size and complexity of the project, the materials used, and whether you're doing it yourself or hiring professionals.
Design and Planning
Designing and planning your bump-out addition can range from free (if you're doing it yourself) to several hundred dollars if you hire an architect or designer. HomeGuide estimates that hiring an architect can cost between 5% and 20% of your total project cost.
Permits
The cost of permits varies based on your local building department's regulations. On average, you can expect to pay between $400 and $1,800 for permits, according to HomeAdvisor.
Materials
The cost of materials is typically the largest expense in a bump-out addition. HomeGuide estimates that materials can cost between $20,000 and $75,000 depending on the size and quality of the materials used.
Labor
If you're hiring professionals, labor can significantly add to the cost of your project. HomeAdvisor estimates labor costs for a home addition to range from $4,000 to $22,000.
Utilities
If your bump-out addition requires new electrical, plumbing, or HVAC, these costs can add up. Electrical work can cost between $50 and $100 per hour, while plumbing costs range from $45 to $200 per hour. HVAC installation can be a significant cost, with a new system ranging from $1,500 to $10,000 according to HomeAdvisor.
Finishing Costs
The cost of finishing your bump-out addition, including painting, flooring, and fixtures, can vary widely based on your choices. On average, you can expect to pay between $5,500 and $18,500 for interior finishes.
In conclusion, a bump-out addition is a significant investment, but it can also add considerable value to your home. The key to managing costs is careful planning and budgeting. Always factor in a contingency of at least 10-20% for unexpected expenses. Whether you're taking this on as a DIY project or hiring professionals, having a clear understanding of the costs involved can help ensure a successful project.
Detailed Cost Factors
Regional Price Differences
The cost of a bump-out addition can vary significantly depending on your geographical location. Labor and material costs tend to be higher in densely populated urban areas compared to rural regions. For example, homeowners in metropolitan areas like New York City or San Francisco can expect to pay a premium for both labor and materials due to the high cost of living and operational expenses.Conversely, those in the Midwest or Southern states might find the costs to be relatively lower. It's important to research local pricing and consult with multiple contractors to get a realistic estimate for your region.
Impact of Seasonal Demand on Labor Costs
Seasonal demand can significantly affect labor costs for your bump-out addition project. During the spring and summer months, when home improvement projects peak, contractors and skilled laborers are in high demand. This can lead to higher bids for your project as contractors juggle multiple jobs. Planning your project for the off-season, such as late fall or winter, can result in lower labor costs as contractors have fewer projects lined up and might be willing to negotiate on pricing to secure work.
Price Fluctuations in Materials
The cost of materials for a bump-out addition can fluctuate due to various factors, including global market trends, natural disasters, and tariffs on imported goods. For instance, the price of lumber can vary significantly based on supply chain disruptions or increased demand for new construction. Similarly, the cost of metals, concrete, and other building materials can vary. Keeping an eye on market trends and planning your purchase of materials can help mitigate these fluctuations. Sometimes, locking in prices with your contractor or supplier early in the planning process can save you money in the long run.
Additional Cost Factors to Consider:
- Complexity of the Design: A bump-out addition with complex architectural details or custom finishes will require more labor and potentially expensive materials, driving up the cost.
- Accessibility: The ease of access to the project site can affect labor costs. If your home is difficult to access due to terrain or other factors, it may increase the time and labor required to complete the project.
- Existing Structure Modifications: If the bump-out addition requires significant modifications to your home's existing structure, such as removing load-bearing walls or rerouting utilities, this can add to the cost.
- Permit and Inspection Fees: The cost of obtaining building permits and undergoing inspections varies by municipality and can add to the overall cost of your project.
- Energy Efficiency Requirements: Adhering to energy efficiency standards and incorporating green building materials can initially increase costs but result in long-term savings on utility bills.
Understanding these cost factors and their potential impact on your bump-out addition project can help you budget more accurately and make informed decisions throughout the planning and construction process. Always allocate a contingency fund in your budget to cover unexpected expenses, ensuring your project stays on track financially.
Common Pitfalls in Planning and Executing a Bump-Out Addition
Undertaking a bump-out addition can be an exciting way to enhance your home’s functionality and aesthetic appeal. However, without proper planning and execution, several common pitfalls can turn the project into a stressful and costly endeavor. Here are some challenges homeowners might encounter, along with strategies to avoid or mitigate these issues:
- Underestimating Costs:
Many homeowners start their projects with an optimistic budget that doesn't account for unexpected expenses. To avoid this, add a contingency of at least 20% to your initial estimate to cover unforeseen costs.
- Ignoring Zoning Laws and Building Codes:
Failing to adhere to local zoning laws and building codes can lead to costly penalties and even require you to demolish your new addition. Always check with your local building department to ensure your project complies with all regulations before beginning work.
- Choosing the Wrong Contractor:
Hiring a contractor based solely on cost can lead to disappointing results. Conduct thorough research, check references, and interview multiple contractors to find one with a solid track record and good communication skills.
- DIY Overreach:
Overestimating your DIY skills can result in subpar work that may need to be redone by a professional, doubling your costs. Be realistic about your abilities and consider hiring professionals for complex tasks like electrical work, plumbing, or structural changes.
- Neglecting the Impact on Home’s Overall Design:
A bump-out addition that doesn't complement your home's existing style can look out of place and negatively impact curb appeal. Work with a designer to ensure your addition blends seamlessly with the rest of your home.
- Improper Planning for Utilities:
Overlooking the need to extend or reroute utilities can lead to significant additional costs. Plan for electrical, plumbing, and HVAC needs early in the process to avoid surprises.
FAQs About Bump-Out Home Additions
1. What is a bump-out addition? A bump-out addition is a small extension to an existing room or structure, designed to add extra space without the need for a full-scale home addition.
2. How much does a bump-out addition cost? The cost of a bump-out addition can vary significantly. On average, homeowners can expect to spend between $30,000 and $80,000, depending on the size, materials, and whether they're doing it themselves or hiring professionals.
3. Do I need a permit for a bump-out addition? Yes, in most cases, you will need a permit from your local building authority before starting a bump-out addition. Check with your local building department for specific requirements.
4. Can I build a bump-out addition myself? Yes, it's possible to build a bump-out addition yourself, but it requires a good understanding of construction principles and adherence to local building codes. It's recommended to hire professionals for complex projects or if you're unsure about any aspects of the construction process.
5. How long does it take to build a bump-out addition? The time frame for a bump-out addition can vary, but on average, you can expect the project to take between 2-3 months from start to finish. This timeline can be longer if you're doing the work yourself or if unforeseen issues arise during construction.
In conclusion, whether to DIY or hire a professional for a bump-out addition depends on your budget, skill level, and project complexity. Costs can range considerably, with variables like design, materials, labor, and permits playing significant roles. A well-planned and executed bump-out addition can add considerable value to your home, but it requires an understanding of construction principles and local building codes.
At SimpleDirect, we're here to help guide you through these decisions. Whether you're looking for advice, cost estimations, or professional recommendations, get in touch with us today. Let's make your dream home a reality together.